Juicy Air Fryer Cheeseburgers Recipe — Quick, 20-Minute Dinner (Crispy Edges, Melty Cheese, Family Favorite)
If you’ve ever wanted the flavor of a grilled cheeseburger without standing over a smoky pan or firing up the grill, the air fryer is your secret weapon. It sears the outside, keeps the inside juicy, and melts the cheese perfectly—all in minutes and with minimal cleanup. This method is fast enough for weeknights, consistent enough for beginners, and customizable enough for serious burger lovers.

Below, you’ll find a complete, plain-English guide: what an air fryer cheeseburger is, exactly which ingredients to buy and why, and how to cook step by step so your burgers come out juicy every single time. I’ll also cover serving ideas, storage and reheating, common mistakes, clever tips, and easy variations so you can make this recipe your own.
Also Read: Taco Bell Nacho Fries Recipe
What Is an Air Fryer Cheeseburger?

An air fryer cheeseburger is simply a seasoned beef patty cooked with hot, circulating air until the outside browns and the center reaches your preferred doneness, then topped with cheese to melt. The hot airflow mimics the dry heat of a grill, creating crispy edges without a lot of oil. Because air fryers heat quickly and cook evenly, you get reliable results: a gently charred exterior, a juicy interior, and perfectly melted cheese, every time. You can toast your buns in the air fryer, too, which gives you that restaurant finish without turning on the stove or grill.
Main Ingredients Of Air Fryer Cheeseburger
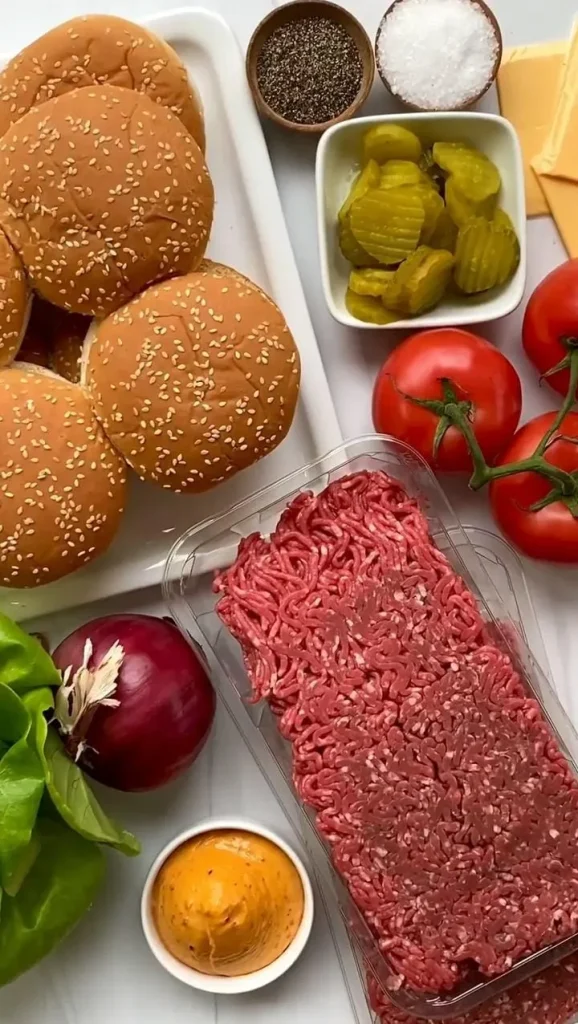
Ground Beef (80/20)
For classic, juicy burgers, choose ground chuck around 80% lean, 20% fat. That 20% fat is what bastes the patty from the inside and keeps it moist. Lean blends (90/10) can turn dry and crumbly. If you prefer leaner meat, add moisture with a teaspoon of olive oil or a tablespoon of mayo mixed into the meat, but 80/20 is the most forgiving.
Salt and Black Pepper
Seasoning is simple because beef tastes great on its own. Use fine or kosher salt and freshly ground black pepper. Salt the outside just before cooking; it draws moisture if mixed into the meat too early. Pepper adds warmth and a little bite that wakes up the beef.
Garlic Powder and Onion Powder
These pantry basics give burger-shop depth without chunks of raw onion inside the patty. They’re optional but highly recommended for consistent, savory flavor.
Worcestershire Sauce
A dash adds umami and a mild sweetness that makes homemade burgers taste like a classic diner version. It also helps the surface brown beautifully in the air fryer.
Sliced Cheese
American cheese melts into a silky blanket. Cheddar brings sharpness, pepper jack adds heat, Swiss gives nutty notes. Use what you love; one slice per patty is standard, two if you want a deluxe melt.
Buns
Brioche buns are soft and slightly sweet, potato buns are pillowy and sturdy, and sesame buns give nostalgia and grip. Toasting buns in the air fryer for a minute or two adds structure so they don’t get soggy.
Oil Spray
A neutral oil spray keeps the basket from sticking and helps browning. Go light—too much oil defeats the point of air frying.
Optional Toppings and Sauces
Classic: lettuce, tomato, onion, pickles. Sauces: ketchup, mustard, mayo, or a quick burger sauce (mayo + ketchup + mustard + chopped pickles or pickle brine). These add crunch, tang, and balance to the rich patty.
How to Prepare Air Fryer Cheeseburgers (Step-by-Step)

Step 1: Mix a Simple Seasoning, Then Form Patties
In a small bowl, stir together 1 teaspoon salt, 1/2 teaspoon black pepper, 1/2 teaspoon garlic powder, and 1/2 teaspoon onion powder. Place 1 pound of ground beef in a mixing bowl. Gently pull it apart into loose clumps—don’t mash. Divide into four equal portions for quarter-pound burgers. Using your fingertips, shape each portion into a 4–4½-inch patty, about 1/2-inch thick. Make a shallow dimple in the center with your thumb; this keeps the patty from puffing into a meatball as it cooks.
Step 2: Season the Outside, Not the Inside
Sprinkle the seasoning blend over both sides of each patty. Drizzle or brush a few drops of Worcestershire on each side and pat it in. Seasoning the surface right before cooking gives maximum flavor and keeps the interior tender. If you mix salt into the meat ahead of time, it can change the texture and squeeze out moisture—great for meatballs, not for burgers.
Step 3: Preheat the Air Fryer Properly
Preheat your air fryer at 375–380°F for 4–5 minutes with the empty basket inside. A hot basket sears the underside immediately, helping browning and reducing sticking. Lightly mist the basket with oil spray just before adding patties for extra insurance.
Step 4: Cook the First Side (Don’t Crowd)
Place patties in a single layer with a little space between them so the air circulates. Cook at 375–380°F for 5–6 minutes for quarter-pound patties. You should hear a gentle sizzle as soon as they hit the hot basket. Resist the urge to press down—pressing squeezes out juices.
Step 5: Flip for Even Browning
Flip the patties carefully with a spatula or tongs. Cook another 3–5 minutes, depending on thickness and your air fryer’s power. Air fryers vary; use visual cues (browned edges, beads of juice rising) and, for precision, an instant-read thermometer.
Step 6: Add Cheese at the End
When patties are within a minute of your target doneness, lay a slice of cheese on each one and close the basket for 30–60 seconds to melt. If your air fryer blasts air so hard that cheese wants to fly, tent a small square of parchment over the patty or switch the heat off and let residual heat melt the cheese.
Step 7: Toast the Buns
Remove patties to rest 2–3 minutes. Meanwhile, split buns and place them cut-side up in the air fryer basket. Air fry at 350°F for 1–2 minutes until edges are lightly golden. A brief toast adds texture and helps buns stand up to sauces and juices.
Step 8: Build Your Burger
Spread sauces on the buns, add lettuce for crunch, then the patty, topped with tomato, onion, and pickles. That order protects the bun from moisture and keeps the stack stable. Serve immediately while everything is hot and the cheese is soft.
Doneness Guide (use an instant-read thermometer for accuracy)
- Medium: 140–145°F (slightly pink, juicier)
- Medium-well: 150–155°F (faint blush, still moist)
- Well-done: 160°F+ (fully cooked, safest for ground beef)
Adjust times for patty thickness. Thicker patties need an extra minute or two; thinner smash-style patties cook faster.

How to Serve Air Fryer Cheeseburgers (In-Depth)
When your patties are cooked, cheese is melted, and buns are toasted, the way you serve your cheeseburger can elevate it from a simple weeknight dinner to a memorable meal. Serving isn’t just about plating—it’s about creating balance with sides, textures, and flavors that complement the richness of the burger.
1. Classic American Diner Style
For a traditional touch, serve your cheeseburger with crispy fries (air-fried or oven-baked) and a side of dill pickles. Add a small ramekin of ketchup and mustard on the plate for dipping. Place the burger in the center of a large plate with fries piled neatly to one side—just like at a diner. A simple coleslaw or a handful of potato chips can add crunch without much effort.

2. Gourmet Presentation
Want your air fryer cheeseburgers to feel upscale? Place the burger on a wooden serving board lined with parchment. Serve alongside a small bowl of sweet potato fries, aioli dipping sauce, or even truffle fries if you want to go fancy. Top the burger with unique garnishes like caramelized onions, arugula, or microgreens. Drizzle a little sauce on the board itself for that restaurant-style plating.
3. Game Day or Family Style
For parties, instead of plating individually, set up a burger bar. Place patties, buns, cheeses, and toppings in separate bowls or platters so everyone can build their own burger. Include classics like lettuce, tomato, onion, and pickles, but also fun extras like jalapeños, sautéed mushrooms, bacon, avocado slices, and multiple sauces. Keep the patties warm on a tray in the oven while guests assemble.
4. Balanced Meal with Fresh Sides
Cheeseburgers are rich, so pairing them with light, fresh sides balances the meal. A simple green salad with vinaigrette, cucumber tomato salad, or grilled vegetables keeps things refreshing. You can also serve a fruit salad or melon wedges alongside—something juicy and sweet helps cut through the savory beef and cheese.

5. Kid-Friendly Serving
For younger eaters, serve the cheeseburger as a slider on smaller buns. Pair with carrot sticks, apple slices, or mini corn on the cob. Instead of a large plate, use a compartment-style tray so each item feels fun and easy to eat. A small dipping sauce cup of ketchup or ranch makes it interactive and appealing for kids.
6. Bun Alternatives
If you’re serving for guests with different dietary needs, swap out regular buns for lettuce wraps, whole-grain buns, or gluten-free rolls. Serving with lettuce wraps makes the burger lighter and carb-conscious, while seeded or whole-grain buns add a nutty flavor and texture.
7. Pairing with Drinks
The right drink makes serving feel complete. A cold soda, lemonade, or iced tea keeps things casual and refreshing. For adults, pair with a light beer, cider, or even a glass of red wine like a fruity Zinfandel, which complements the savory beef.
8. Presentation Matters
Stack the burger so the toppings peek out, showing layers of cheese, lettuce, and tomato. Secure with a wooden skewer if tall, then serve on a plate or board with a paper liner for that restaurant feel. Add small bowls of dipping sauces or extra pickles to elevate the presentation.

How to Store and Reheat
Let leftover patties cool, then refrigerate in an airtight container for up to 3–4 days. Reheat in the air fryer at 320–330°F for 3–4 minutes; add cheese during the last 30 seconds. To freeze, wrap cooked patties individually and freeze up to 2 months. Reheat from frozen at 330°F for 8–10 minutes, adding cheese at the end. If you want meal-prep convenience, form raw patties between parchment squares and freeze; air fry from frozen at 360–370°F for 8–11 minutes, flipping once.
Common Mistakes to Avoid
- Overworking the meat: kneading compresses the proteins and makes patties tight and dry. Handle gently.
- Skipping the preheat: a cold basket steams rather than sears, which dulls flavor and color.
- Crowding the basket: packed patties block airflow and cook unevenly; work in batches for best results.
- Adding cheese too early: it can overcook or blow around; melt at the end.
- Pressing patties while cooking: squeezing forces out juices and dries the burger.
- Oversalting in the mix: salt early inside the meat can change texture; season the surface before cooking instead.
Tips and Tricks
- Make the dimple: a shallow thumbprint in the center prevents doming and ensures even cooking.
- Shape slightly larger than the bun: patties shrink; start wider so they finish the right size.
- Chill briefly: a 10–15 minute chill firms patties so they hold shape when you flip.
- Use a light oil mist: improves browning and reduces sticking without greasiness.
- Batch strategy: keep cooked patties warm on a rack in a low oven (200°F) while you toast buns and finish a second batch.
- Quick house sauce: 2 tbsp mayo + 1 tbsp ketchup + 1 tsp mustard + 1 tsp pickle brine + pinch of paprika. Stir and spread.
Easy Variations
- Double-Cheese Smash Burgers: Form two thin patties per burger; air fry 3–4 minutes total, stacking with cheese between for a diner-style melt.
- Juicy Lucy (Stuffed Cheese): Press a small square of cheese between two thin patties and seal edges well; cook a bit longer so the center melts.
- Turkey or Chicken Burgers: Swap in ground turkey or chicken; mix in 1 tbsp mayo for moisture. Cook to 165°F internal.
- Plant-Based: Use your favorite plant-based patties; air-fry per package timing, add dairy or vegan cheese to finish.
- Bacon Mushroom Swiss: Air-fry bacon first at 350°F until crisp (drain fat), cook patties, then top with Swiss and sautéed mushrooms.
- Spicy Jalapeño Pepper Jack: Mix a pinch of chipotle powder into your seasoning; top with pepper jack and sliced jalapeños.
Conclusion
Air fryer cheeseburgers deliver everything you want from a great burger—savory crust, juicy center, and a perfect cheese melt—without the fuss of a grill or the splatter of a stovetop. With the right meat, simple seasoning, a hot preheated basket, and a few small technique tweaks, you’ll plate up consistent, diner-level burgers in about 20 minutes. Keep this guide handy for weeknights, game days, or whenever the craving hits. Once you master the base recipe, the variations are endless and the results are reliably delicious.