15 Easy Party Snacks – Crowd-Pleasing Finger Food Ideas for Every Gathering
There’s something magical about a table filled with irresistible party snacks, where every bite feels like a celebration. When friends and family gather, it’s the small, flavorful bites that keep everyone coming back for more.
In the middle of busy schedules and last-minute plans, easy party snacks become the heart of stress-free hosting. They bring comfort, excitement, and those little moments of joy that make gatherings unforgettable.
From crispy, cheesy favorites to fresh, vibrant bites, every snack tells its own story.
You don’t need complicated recipes to impress your guests—just simple ideas done right.
These party snacks are designed to make your table feel full, your guests feel happy, and your hosting feel effortless.
Why Party Snacks Make Every Gathering Better
A great party isn’t just about the main dish—it’s about the variety and excitement of small bites that everyone can enjoy.
Party snacks create a relaxed atmosphere where guests can mingle, chat, and snack at their own pace. They’re easy to share, easy to serve, and perfect for both casual and special occasions.
What makes party snacks truly special is their versatility. You can mix flavors, textures, and styles to suit every taste. From crunchy to creamy, spicy to mild, a well-planned snack table ensures there’s something for everyone without overwhelming the host.
How to Choose the Perfect Party Snacks
The key to unforgettable party snacks is balance. Combine hot and cold options, crispy and soft textures, and bold and mild flavors. This keeps your snack table interesting and inviting from the first bite to the last.
Another important tip is simplicity. Choose recipes that are easy to prepare and serve. Many of these party snacks can be made ahead of time or require minimal cooking, giving you more time to enjoy the gathering instead of staying in the kitchen.
Quick Overview of Party Snacks
| # | Recipe Name | Type | Prep Time | Calories | Highlight |
|---|---|---|---|---|---|
| 1 | Cheesy Garlic Bread Bites | Vegetarian | 15 mins | 320 | Crispy and cheesy |
| 2 | Mini Chicken Sliders | Main Snack | 20 mins | 400 | Juicy and filling |
| 3 | Veggie Spring Rolls | Vegetarian | 20 mins | 250 | Fresh and crunchy |
| 4 | Loaded Nachos | Snack | 15 mins | 420 | Perfect for sharing |
| 5 | Potato Cheese Balls | Snack | 25 mins | 350 | Crispy outside |
| 6 | Chicken Popcorn Bites | Snack | 20 mins | 380 | Bite-sized favorite |
| 7 | Stuffed Mini Peppers | Light Snack | 15 mins | 260 | Colorful and fresh |
| 8 | Crispy Onion Rings | Snack | 20 mins | 300 | Golden and crunchy |
| 9 | Chicken Quesadilla Slices | Snack | 20 mins | 390 | Cheesy and warm |
| 10 | Garlic Butter Shrimp Skewers | Snack | 15 mins | 280 | Flavorful and quick |
| 11 | Mini Pizza Cups | Snack | 20 mins | 350 | Fun and creative |
| 12 | Spicy Corn Chaat | Snack | 15 mins | 270 | Tangy and bold |
| 13 | Cheese Stuffed Mushrooms | Snack | 20 mins | 290 | Rich and savory |
| 14 | Chicken Lettuce Wraps | Light Snack | 20 mins | 260 | Fresh and light |
| 15 | Chocolate Dipped Fruit Bites | Sweet Snack | 15 mins | 220 | Sweet ending |
1. Cheesy Garlic Bread Bites
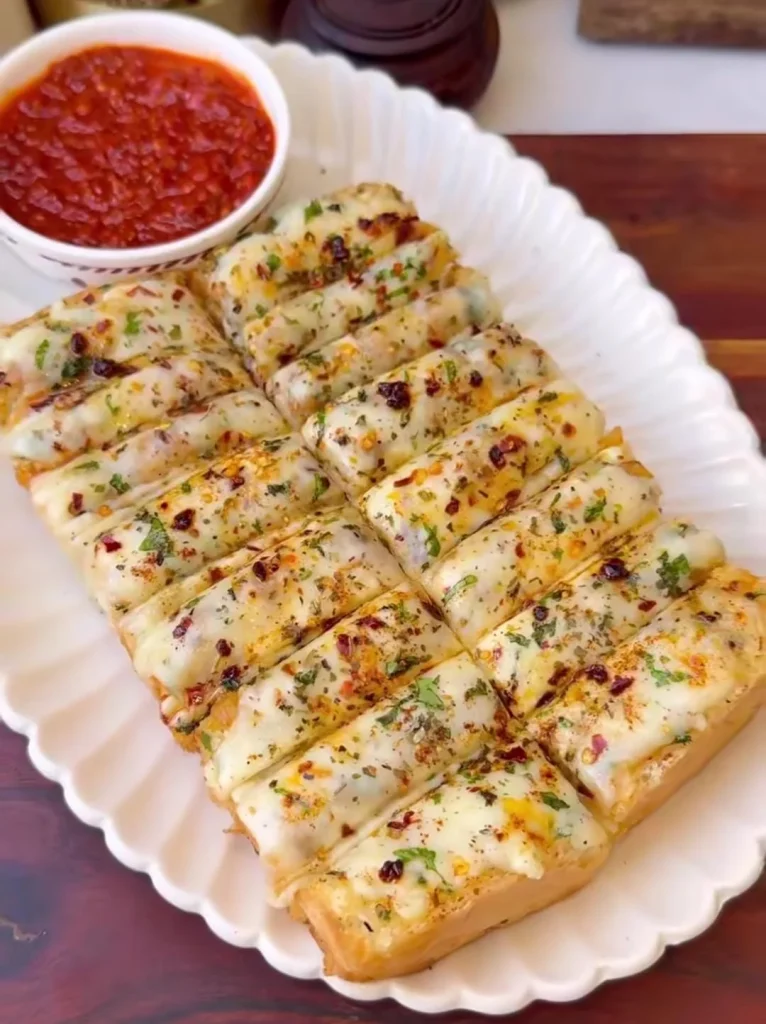
These cheesy garlic bread bites are the ultimate comfort party snack. They’re crispy on the outside, soft on the inside, and loaded with rich garlic flavor. Perfect for sharing, they disappear quickly at any gathering and are incredibly easy to make.
Ingredients
- 1 loaf bread
- 3 tbsp butter
- 3 cloves garlic
- 1 cup shredded cheese
- 1 tbsp parsley
- Salt to taste
Instructions
- Preheat oven to 180°C.
- Slice bread into bite-sized cubes.
- Melt butter in a bowl.
- Add minced garlic.
- Mix well.
- Toss bread cubes in butter mixture.
- Spread on baking tray.
- Sprinkle cheese evenly.
- Add parsley and salt.
- Bake for 10–12 minutes.
- Stir halfway through baking.
- Cook until golden.
- Remove from oven.
- Let cool slightly.
- Serve warm.
Nutrition Notes
These bites provide a satisfying mix of carbs and dairy richness. The garlic enhances flavor naturally, making them irresistible in small portions.
Storage Tips
Store in airtight container for 2 days. Reheat in oven. Avoid sogginess. Keep sealed. Best fresh.
Variations
Spicy Garlic Bites
Add chili flakes to butter. Mix thoroughly before coating bread. Creates a bold, spicy flavor. Bake as usual until crispy. Serve hot for extra kick.
Herb Cheese Bites
Add mixed herbs like oregano and basil. Sprinkle generously before baking. Enhances aroma and taste. Creates a gourmet feel. Perfect for variety.
Cheese Lover Bites
Use a mix of cheeses. Add extra on top. Melt until bubbly. Creates a rich texture. Great for cheese fans.
2. Mini Chicken Sliders
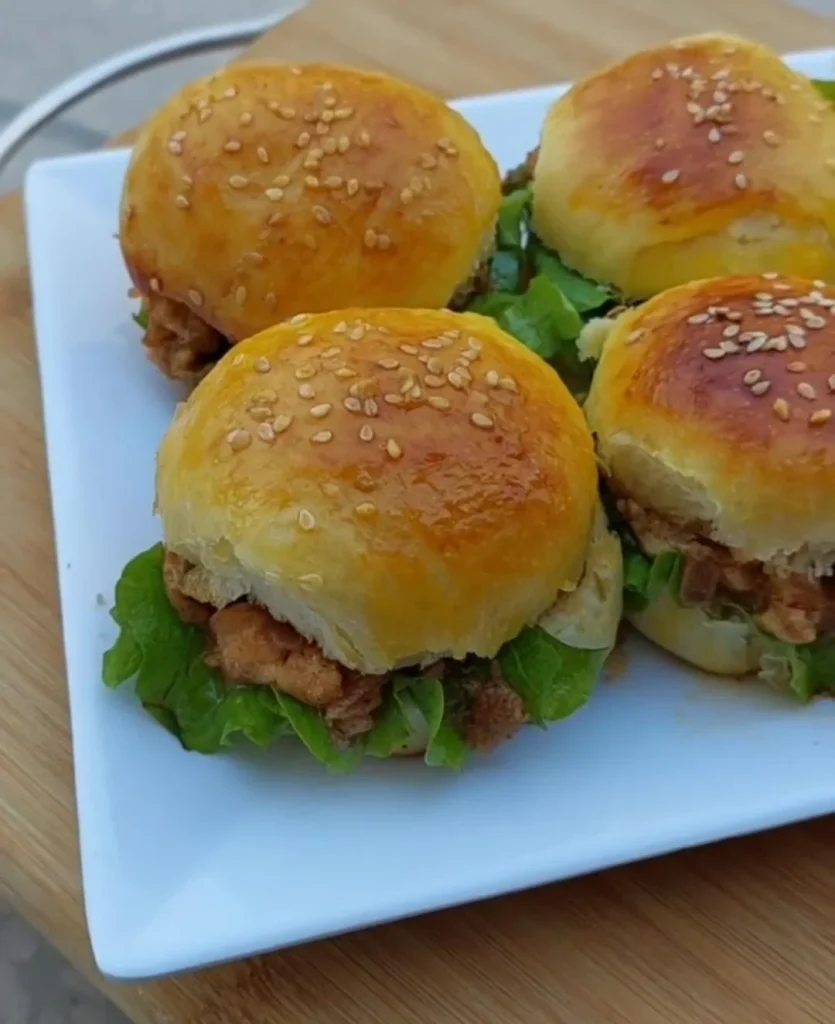
Mini chicken sliders are small in size but big in flavor. They’re juicy, satisfying, and perfect for party snacks that feel more filling. Easy to hold and eat, they’re always a crowd favorite.
Ingredients
- 2 cups cooked chicken
- 6 slider buns
- 2 tbsp mayonnaise
- 1 tbsp ketchup
- 1 onion, sliced
- Salt and pepper
Instructions
- Shred cooked chicken.
- Heat a pan lightly.
- Add chicken and warm it.
- Season with salt and pepper.
- Mix mayonnaise and ketchup.
- Slice slider buns.
- Spread sauce on buns.
- Add chicken evenly.
- Add onion slices.
- Close buns.
- Press lightly.
- Toast slightly if desired.
- Remove from heat.
- Arrange on platter.
- Serve warm.
Nutrition Notes
These sliders provide protein and satisfying flavors in a compact portion. They’re balanced and filling without being too heavy.
Storage Tips
Store filling separately. Assemble fresh. Reheat chicken gently. Keep buns dry. Best served warm.
Variations
Spicy Sliders
Add chili sauce to chicken. Mix well. Adjust spice level. Creates bold flavor. Serve hot.
Cheesy Sliders
Add cheese slice inside. Melt slightly. Adds richness. Perfect for comfort snacking. Serve warm.
BBQ Chicken Sliders
Mix BBQ sauce into chicken. Coat evenly. Adds smoky sweetness. Great for parties. Serve fresh.
3. Veggie Spring Rolls
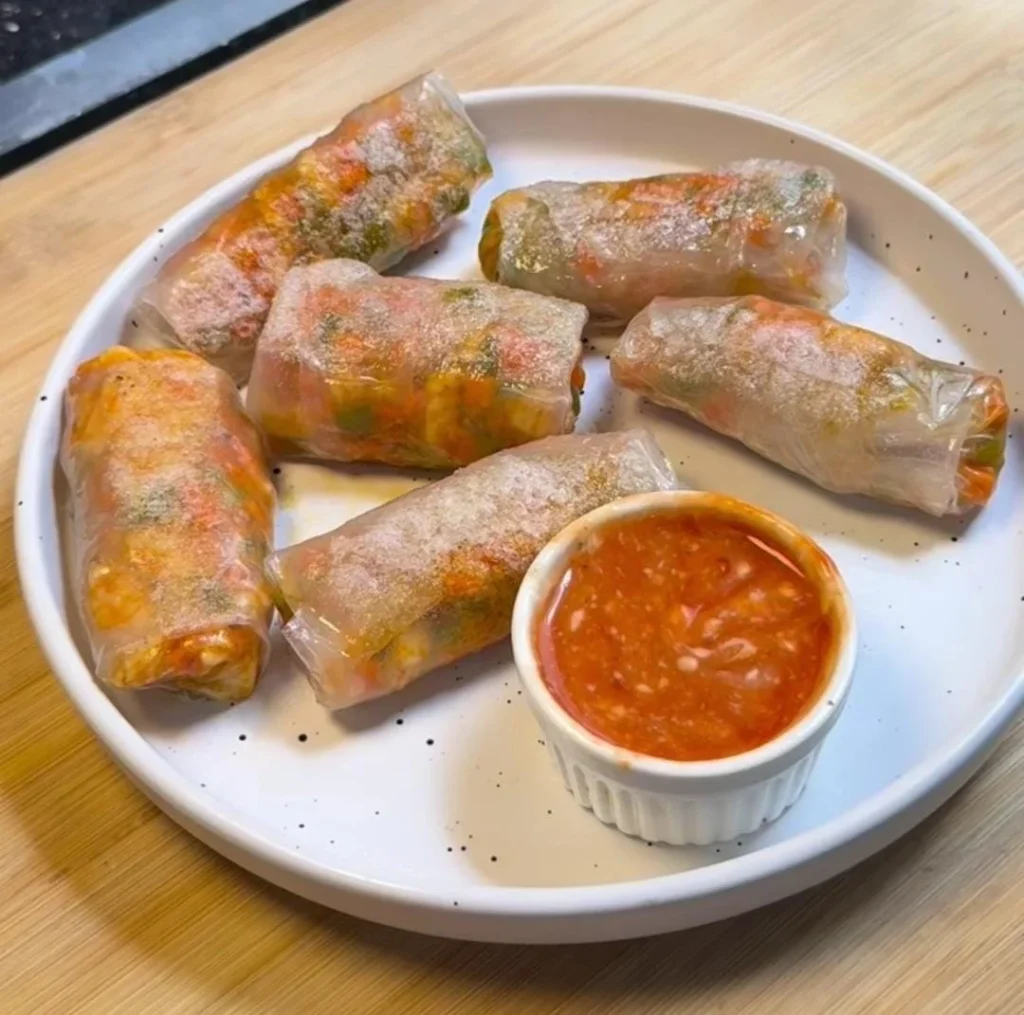
These veggie spring rolls are fresh, crisp, and perfect for adding a light touch to your party snacks table. They bring a satisfying crunch with every bite and feel refreshing alongside heavier options. Easy to prepare and visually appealing, they’re always one of the first dishes to disappear.
Ingredients
- 10 spring roll wrappers
- 1 cup shredded cabbage
- 1 carrot, julienned
- 1 bell pepper, sliced
- 2 tbsp soy sauce
- 2 tbsp oil
- Salt and pepper
Instructions
- Heat oil in a pan.
- Add cabbage and carrot.
- Stir fry for 2–3 minutes.
- Add bell peppers.
- Cook briefly until slightly tender.
- Add soy sauce, salt, and pepper.
- Mix well and cool filling.
- Lay wrapper flat.
- Add filling in center.
- Fold sides and roll tightly.
- Seal edges with water.
- Heat oil for frying.
- Fry rolls until golden.
- Remove and drain excess oil.
- Serve hot.
Nutrition Notes
These rolls combine fresh vegetables with a crisp texture, offering a balanced bite. They feel light yet satisfying, making them perfect alongside richer party snacks.
Storage Tips
Store uncooked rolls in fridge for 1 day. Fry fresh for best texture. Keep cooked rolls for up to 2 days. Reheat in oven. Avoid sogginess.
Variations
Baked Spring Rolls
Brush rolls with oil and bake instead of frying. Cook until golden and crisp. This gives a lighter texture. Still flavorful and satisfying. Serve warm with dip.
Spicy Spring Rolls
Add chili sauce to vegetable mix. Stir well before filling. Adjust heat level to taste. Creates bold flavor. Serve hot.
Chicken Spring Rolls
Add cooked shredded chicken to filling. Mix evenly with vegetables. Makes them more filling. Perfect for hearty party snacks. Serve warm.
4. Loaded Nachos
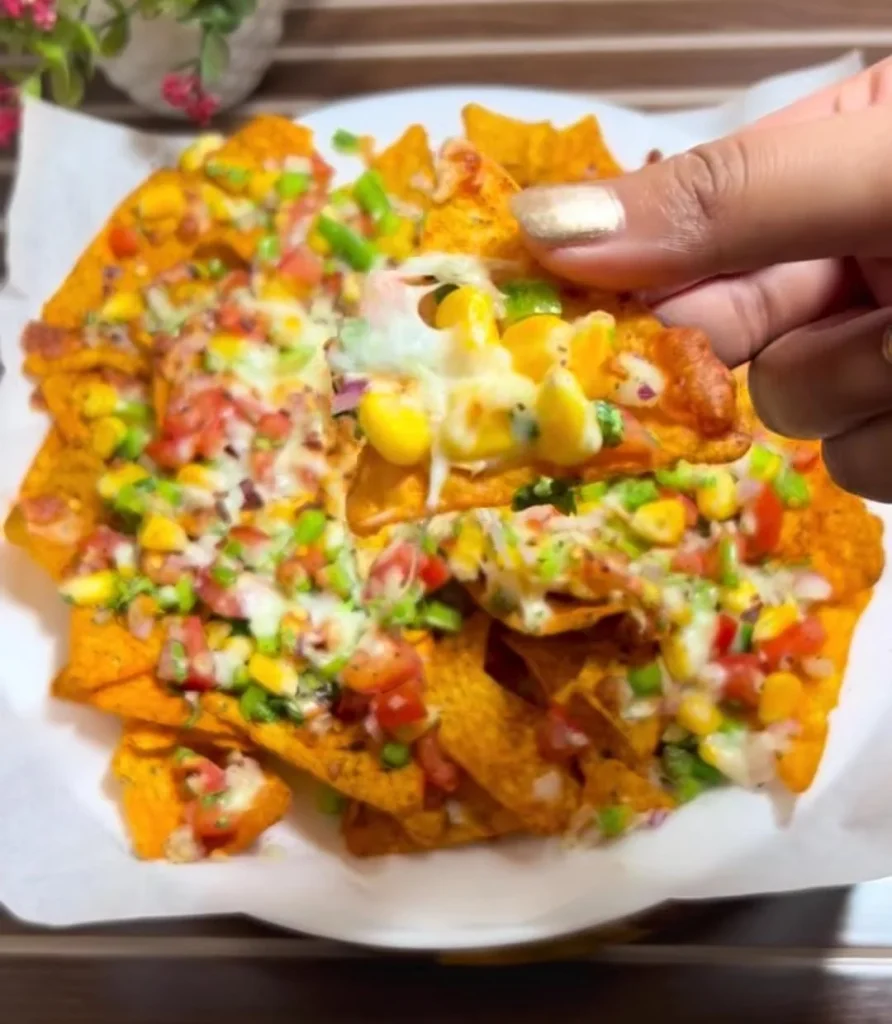
Loaded nachos are the ultimate sharing snack, full of layers, textures, and bold flavors. They’re quick to assemble and always bring excitement to any party table. Perfect for casual gatherings where everyone wants something fun and satisfying.
Ingredients
- 1 bag tortilla chips
- 1 cup cooked ground meat or beans
- 1 cup shredded cheese
- 1 tomato, diced
- ½ cup corn
- 2 tbsp sour cream
Instructions
- Preheat oven to 180°C.
- Spread chips on baking tray.
- Add cooked meat or beans.
- Sprinkle cheese evenly.
- Add corn and tomatoes.
- Bake for 10 minutes.
- Remove when cheese melts.
- Drizzle sour cream.
- Add extra toppings if desired.
- Let cool slightly.
- Serve immediately.
- Use spatula to portion.
- Keep warm if needed.
- Adjust toppings.
- Enjoy fresh.
Nutrition Notes
Nachos offer a mix of carbs, protein, and dairy. They’re best enjoyed in moderate portions and paired with fresh toppings for balance.
Storage Tips
Best eaten fresh. Store leftovers for 1 day. Reheat in oven. Avoid soggy chips. Keep toppings separate if possible.
Variations
Vegetarian Nachos
Use beans instead of meat. Add extra vegetables. Keeps it light and colorful. Great for variety. Serve warm.
Spicy Nachos
Add jalapeños and chili sauce. Mix into layers. Adjust spice level. Bold and exciting flavor. Serve hot.
Cheesy Nachos
Add extra cheese layers. Melt until bubbly. Creates rich texture. Perfect indulgent snack. Serve immediately.
5. Potato Cheese Balls
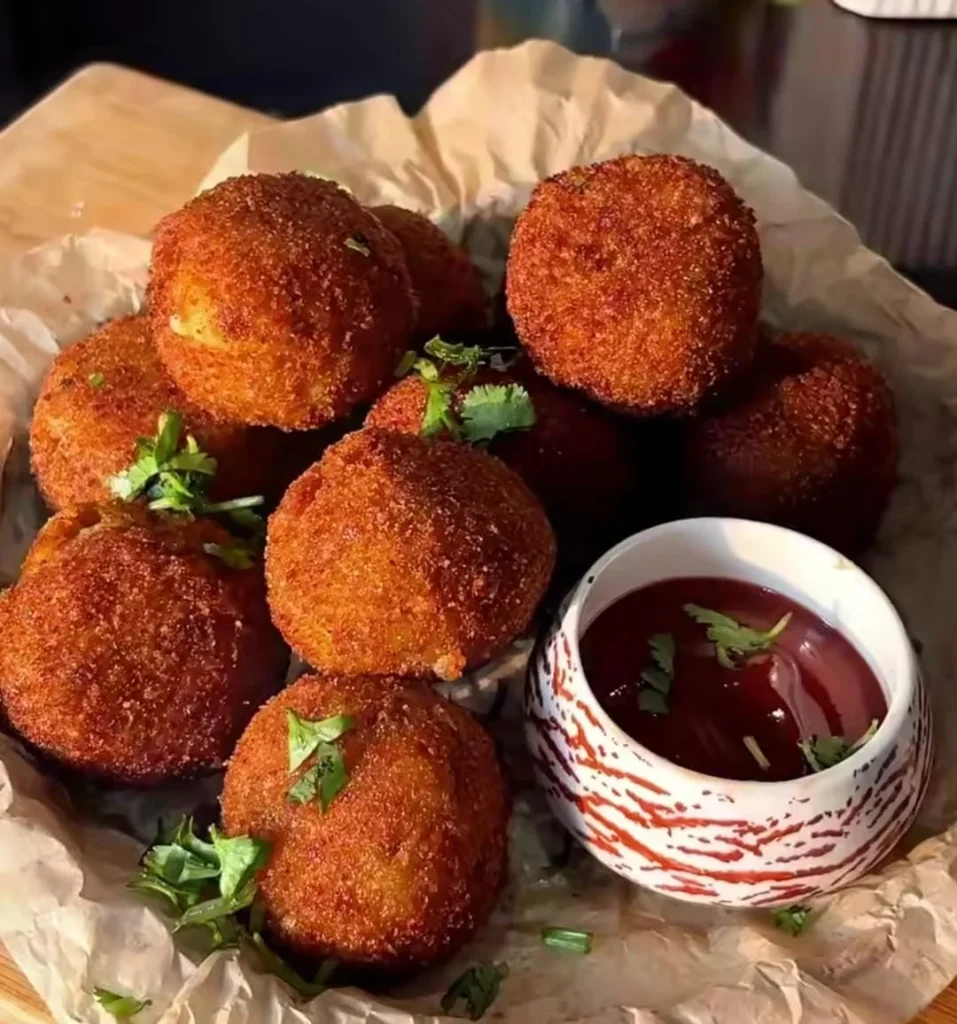
These potato cheese balls are crispy on the outside and soft and cheesy inside. They’re one of those party snacks that feel comforting and indulgent without being complicated.
Ingredients
- 3 potatoes, boiled
- 1 cup cheese cubes
- 2 tbsp flour
- Salt and pepper
- 1 cup breadcrumbs
- Oil for frying
Instructions
- Mash boiled potatoes.
- Add salt and pepper.
- Mix until smooth.
- Take small portion.
- Add cheese cube inside.
- Shape into ball.
- Coat with flour.
- Dip in water lightly.
- Roll in breadcrumbs.
- Repeat for all balls.
- Heat oil in pan.
- Fry until golden.
- Remove and drain oil.
- Let cool slightly.
- Serve warm.
Nutrition Notes
These bites provide comforting carbs with a creamy cheese center. They’re rich, satisfying, and perfect in small portions.
Storage Tips
Store for 2 days. Reheat in oven. Avoid microwaving too long. Keep sealed. Best crispy when fresh.
Variations
Spicy Cheese Balls
Add chili flakes to potato mix. Mix thoroughly. Creates bold flavor. Fry as usual. Serve hot.
Herb Cheese Balls
Add herbs like parsley. Mix into potatoes. Enhances aroma. Fresh twist. Serve warm.
Chicken Cheese Balls
Add shredded chicken. Mix well. Makes them more filling. Perfect for hearty snacks. Serve hot.
6. Chicken Popcorn Bites
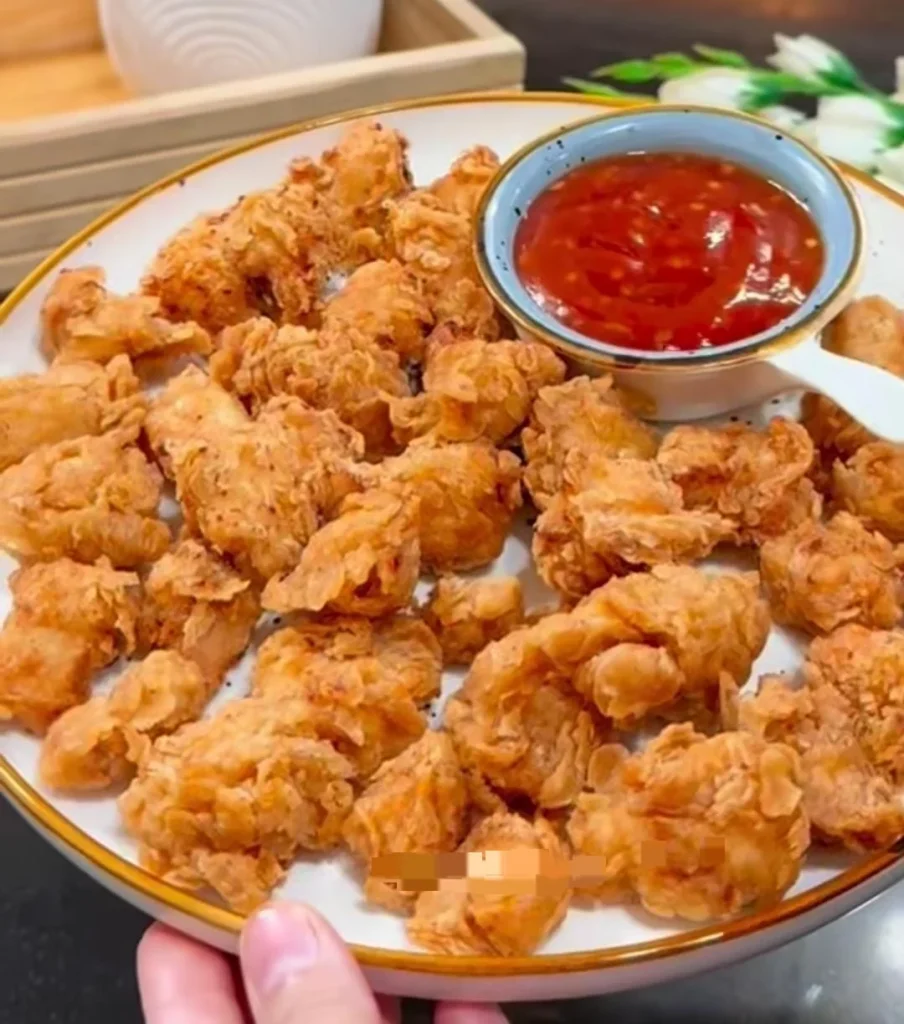
These chicken popcorn bites are crispy, juicy, and perfect for grabbing by the handful. They’re easy to make and always a hit at parties.
Ingredients
- 300g chicken, diced
- 1 cup flour
- 1 egg
- Salt and pepper
- Oil for frying
Instructions
- Season chicken pieces.
- Beat egg in bowl.
- Coat chicken in flour.
- Dip in egg.
- Coat again in flour.
- Heat oil.
- Fry chicken pieces.
- Cook until golden.
- Remove and drain oil.
- Repeat for all pieces.
- Let cool slightly.
- Serve hot.
- Add dipping sauce.
- Adjust seasoning.
- Enjoy fresh.
Nutrition Notes
These bites provide protein with a crispy coating. They’re satisfying and best enjoyed fresh with simple dips.
Storage Tips
Store for 2 days. Reheat in oven. Avoid sogginess. Keep sealed. Best crispy.
Variations
Spicy Chicken Bites
Add chili powder to coating. Mix well. Fry as usual. Bold flavor. Serve hot.
Garlic Chicken Bites
Add garlic powder. Mix into flour. Enhances taste. Comforting flavor. Serve warm.
Herb Chicken Bites
Add dried herbs. Mix evenly. Adds aroma. Light twist. Serve fresh.
7. Stuffed Mini Peppers
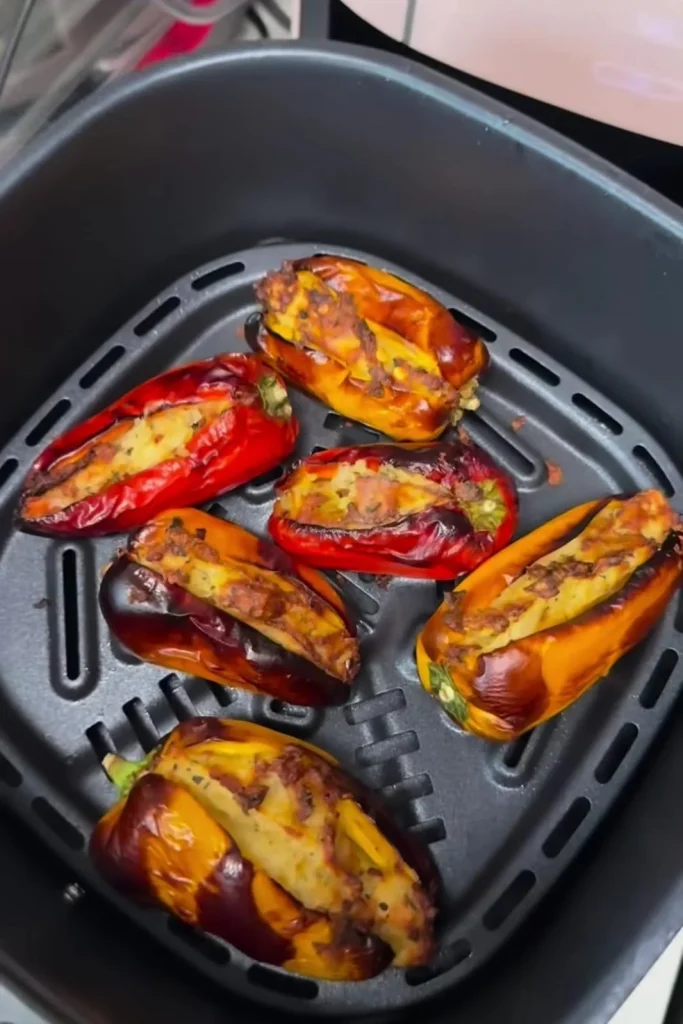
These stuffed mini peppers are colorful, fresh, and perfect for lighter party snacks. They add brightness to your table and are easy to prepare.
Ingredients
- 10 mini peppers
- 1 cup cream cheese
- 1 tbsp herbs
- Salt and pepper
Instructions
- Wash peppers.
- Slice in half.
- Remove seeds.
- Mix cream cheese and herbs.
- Add salt and pepper.
- Fill each pepper half.
- Arrange on tray.
- Chill slightly.
- Serve fresh.
- Adjust seasoning.
- Garnish if desired.
- Keep chilled.
- Serve immediately.
- Refill if needed.
- Enjoy.
Nutrition Notes
These snacks are light and fresh with a creamy filling. They balance heavier dishes on the table.
Storage Tips
Store in fridge for 2 days. Keep covered. Serve chilled. Avoid drying. Best fresh.
Variations
Spicy Peppers
Add chili flakes to filling. Mix well. Adjust spice. Bold flavor. Serve chilled.
Cheesy Peppers
Add grated cheese. Mix into cream cheese. Rich taste. Serve fresh.
Chicken Peppers
Add shredded chicken. Mix well. Makes filling hearty. Serve chilled.
8. Crispy Onion Rings
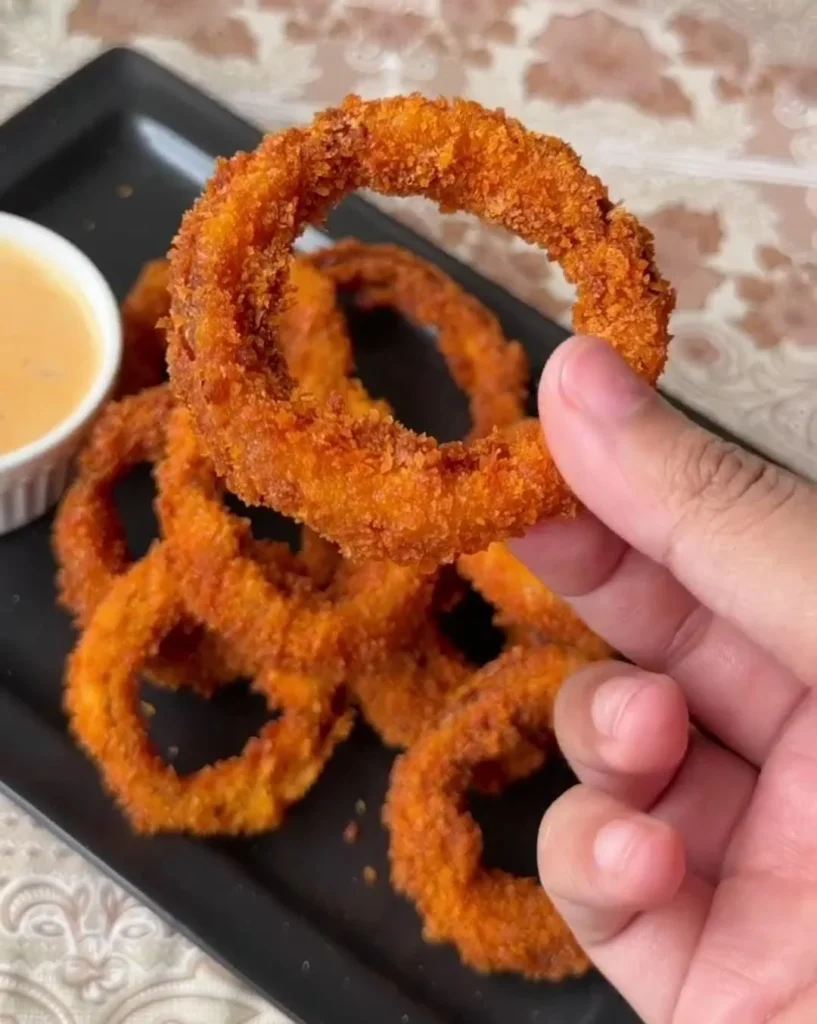
Crispy onion rings are one of those classic party snacks that instantly bring comfort and crunch to the table. Golden on the outside and soft on the inside, they’re simple yet incredibly satisfying. Perfect for dipping and sharing, they never stay on the plate for long.
Ingredients
- 2 large onions
- 1 cup flour
- 1 egg
- 1 cup breadcrumbs
- Salt and pepper
- Oil for frying
Instructions
- Slice onions into rings.
- Separate each ring carefully.
- Season flour with salt and pepper.
- Beat egg in a bowl.
- Dip onion rings in flour.
- Coat evenly.
- Dip into egg mixture.
- Roll in breadcrumbs.
- Repeat coating if needed.
- Heat oil in a pan.
- Fry rings in batches.
- Cook until golden brown.
- Remove and drain excess oil.
- Let cool slightly.
- Serve hot.
Nutrition Notes
These onion rings provide a satisfying crunch and a comforting texture. They’re best enjoyed in moderation alongside lighter party snacks.
Storage Tips
Store for up to 2 days. Reheat in oven for crispiness. Avoid microwaving too long. Keep sealed. Best fresh.
Variations
Spicy Onion Rings
Add chili powder to flour mixture. Mix evenly for consistent heat. Fry as usual until crispy. Creates a bold flavor profile. Serve hot with dip.
Herb Onion Rings
Add dried herbs to breadcrumbs. Enhances aroma and taste. Keeps flavor balanced. Fry until golden. Serve warm.
Cheesy Onion Rings
Mix grated cheese into breadcrumbs. Coat rings thoroughly. Fry until crispy. Adds richness and depth. Serve immediately.
9. Chicken Quesadilla Slices
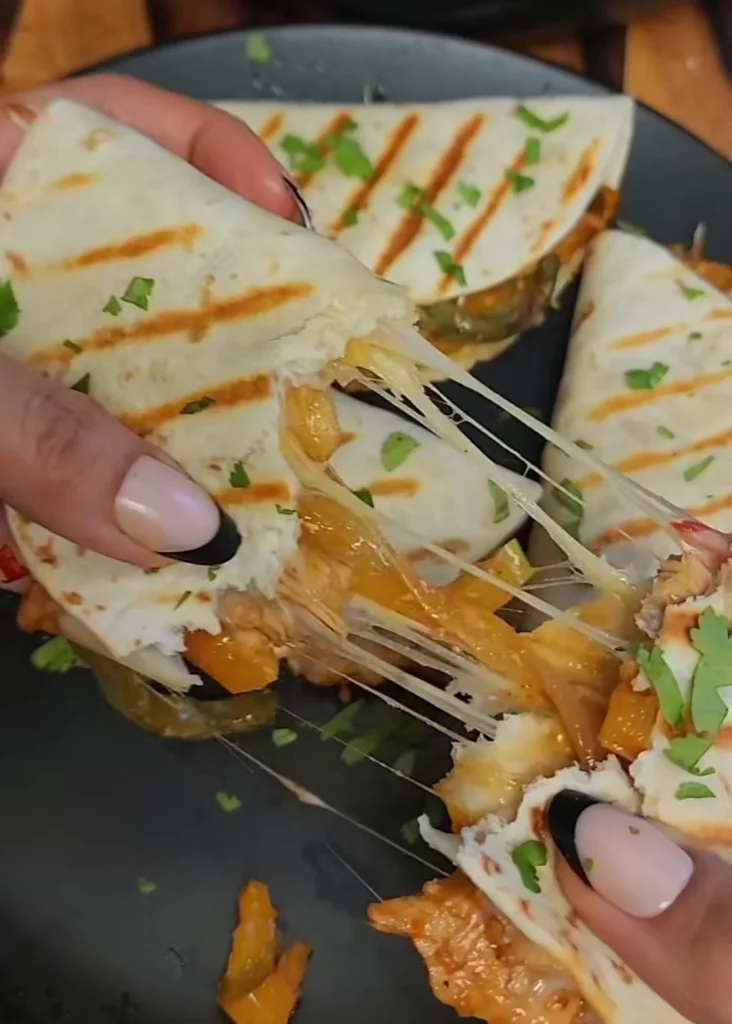
These chicken quesadilla slices are cheesy, warm, and perfect for easy party snacks. The crispy outer layer and melty filling make them irresistible for guests of all ages.
Ingredients
- 2 cups cooked chicken
- 4 tortillas
- 1 cup shredded cheese
- ½ cup vegetables
- 1 tbsp oil
Instructions
- Preheat pan or griddle.
- Add oil lightly.
- Place tortilla on surface.
- Add chicken evenly.
- Add vegetables.
- Sprinkle cheese generously.
- Cover with another tortilla.
- Cook until golden.
- Flip carefully.
- Cook other side.
- Press gently for even crisp.
- Remove from heat.
- Cut into slices.
- Arrange on platter.
- Serve warm.
Nutrition Notes
This dish combines protein, carbs, and dairy for a balanced bite. It’s satisfying and easy to portion for guests.
Storage Tips
Store for 1 day. Reheat in pan. Avoid sogginess. Keep sealed. Best fresh.
Variations
Spicy Quesadilla
Add chili sauce to filling. Mix well before cooking. Adjust spice level. Creates bold flavor. Serve hot.
Cheese Quesadilla
Skip chicken and double cheese. Melt until gooey. Simple and comforting. Great for kids.
Veggie Quesadilla
Add more vegetables instead of chicken. Keeps it light and fresh. Budget-friendly. Serve warm.
10. Garlic Butter Shrimp Skewers
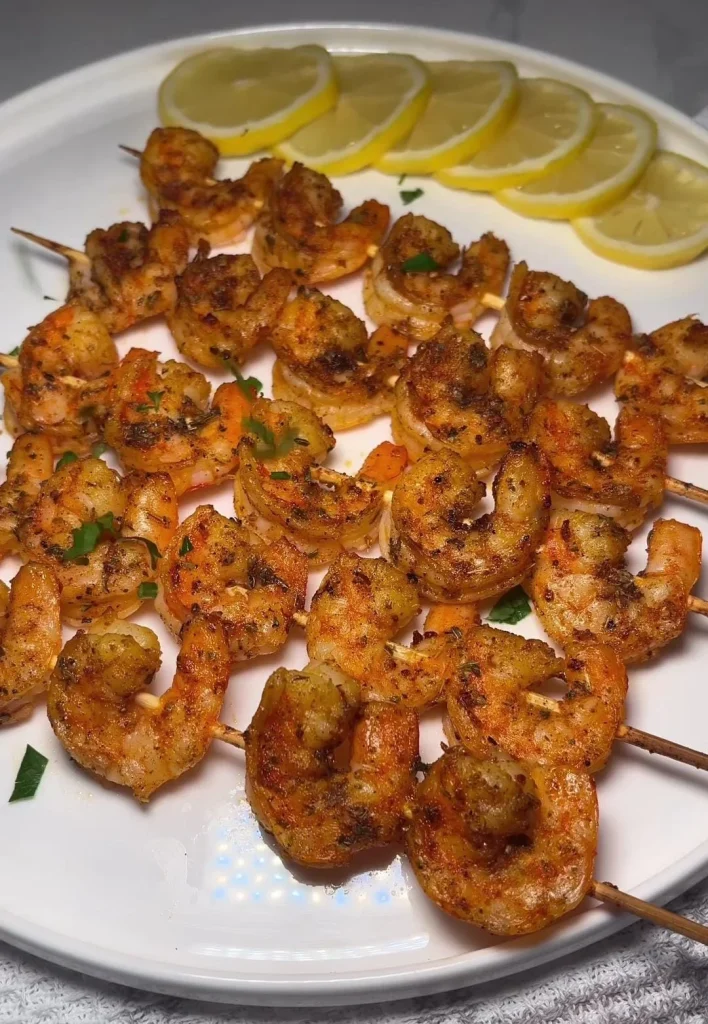
These garlic butter shrimp skewers are elegant yet incredibly simple. They bring a rich, savory flavor that feels special while still fitting perfectly into easy party snacks.
Ingredients
- 400g shrimp
- 3 tbsp butter
- 3 cloves garlic
- 1 tbsp lemon juice
- Salt and pepper
- Skewers
Instructions
- Preheat grill or pan.
- Thread shrimp onto skewers.
- Melt butter in a bowl.
- Add minced garlic.
- Mix well.
- Brush shrimp with butter.
- Season with salt and pepper.
- Place skewers on heat.
- Cook 2–3 minutes per side.
- Turn carefully.
- Brush more butter.
- Add lemon juice.
- Cook until pink.
- Remove from heat.
- Serve hot.
Nutrition Notes
Shrimp provides lean protein with a light yet rich flavor. The butter enhances taste without overwhelming freshness.
Storage Tips
Store for 2 days. Reheat gently. Avoid overcooking. Keep sealed. Best fresh.
Variations
Spicy Shrimp Skewers
Add chili flakes to butter. Mix thoroughly. Brush evenly on shrimp. Cook as usual. Adds bold heat.
Herb Shrimp Skewers
Add fresh herbs to butter mix. Enhances aroma. Light and fresh flavor. Serve warm.
Honey Garlic Shrimp
Add a touch of honey. Mix into butter. Creates sweet glaze. Perfect balance. Serve hot.
11. Mini Pizza Cups
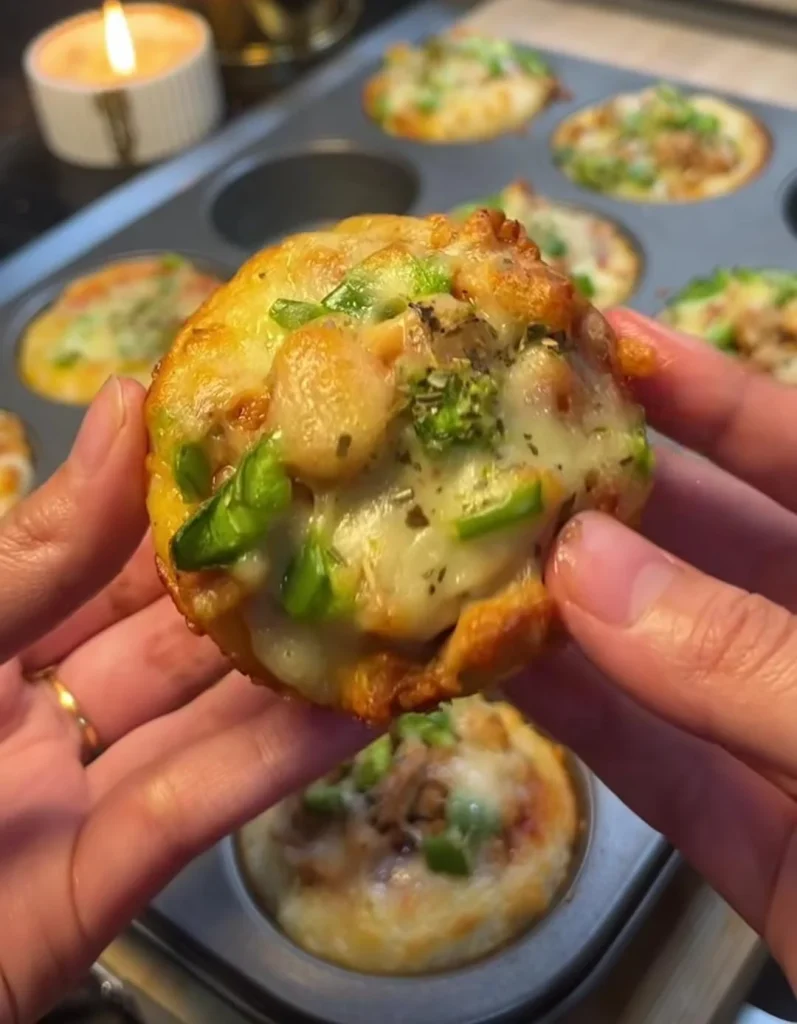
Mini pizza cups are fun, creative, and perfect for bite-sized party snacks. They deliver all the flavor of pizza in a compact, easy-to-serve form.
Ingredients
- 1 sheet dough
- 1 cup pizza sauce
- 1 cup cheese
- ½ cup toppings (chicken or veggies)
Instructions
- Preheat oven to 180°C.
- Roll out dough.
- Cut into small circles.
- Place in muffin tray.
- Press into cups.
- Add pizza sauce.
- Add toppings.
- Sprinkle cheese.
- Bake for 15 minutes.
- Check for golden edges.
- Remove from oven.
- Let cool slightly.
- Remove from tray.
- Arrange on platter.
- Serve warm.
Nutrition Notes
These bites offer a balanced mix of carbs, protein, and fats. They’re filling yet portion-friendly for parties.
Storage Tips
Store for 2 days. Reheat in oven. Keep sealed. Avoid sogginess. Best warm.
Variations
Cheese Pizza Cups
Use only cheese and sauce. Simple and comforting. Perfect for kids. Serve warm.
Spicy Pizza Cups
Add chili flakes or spicy sauce. Mix into toppings. Adds heat. Serve hot.
Veggie Pizza Cups
Use mixed vegetables. Keeps it light. Adds color. Delicious option.
12. Spicy Corn Chaat
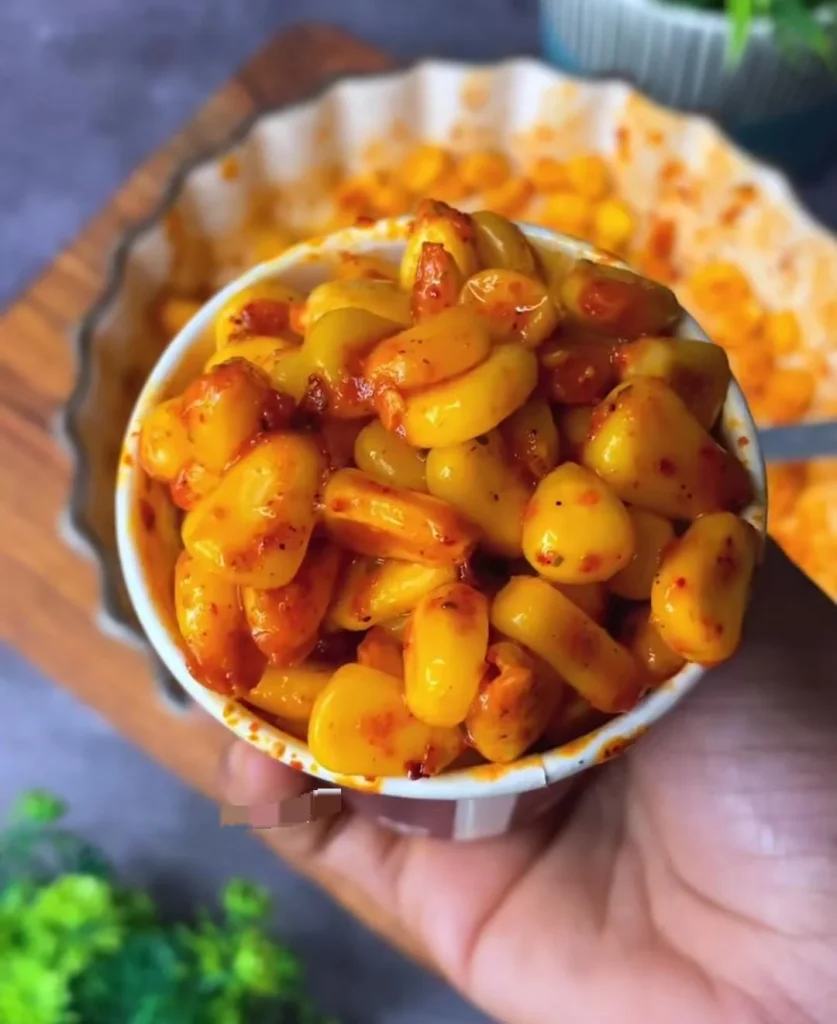
This spicy corn chaat is tangy, bold, and refreshing. It adds a vibrant flavor contrast to heavier party snacks and is incredibly easy to prepare.
Ingredients
- 2 cups boiled corn
- 1 onion, chopped
- 1 tomato, chopped
- 1 tbsp lemon juice
- ½ tsp chili powder
- Salt to taste
Instructions
- Add corn to bowl.
- Add chopped onion.
- Add tomatoes.
- Mix well.
- Add lemon juice.
- Sprinkle chili powder.
- Add salt.
- Mix thoroughly.
- Taste and adjust seasoning.
- Chill slightly.
- Stir before serving.
- Garnish if desired.
- Serve fresh.
- Keep cool.
- Enjoy immediately.
Nutrition Notes
This dish is light, fresh, and full of natural flavors. It adds balance to richer snacks on the table.
Storage Tips
Store for 1 day. Keep refrigerated. Serve chilled. Avoid excess liquid. Best fresh.
Variations
Cheesy Corn Chaat
Add grated cheese. Mix well. Adds richness. Serve fresh.
Spicy Corn Chaat
Add green chilies. Mix evenly. Boosts heat. Serve chilled.
Herb Corn Chaat
Add fresh herbs. Enhances freshness. Light flavor. Serve cool.
13. Cheese Stuffed Mushrooms
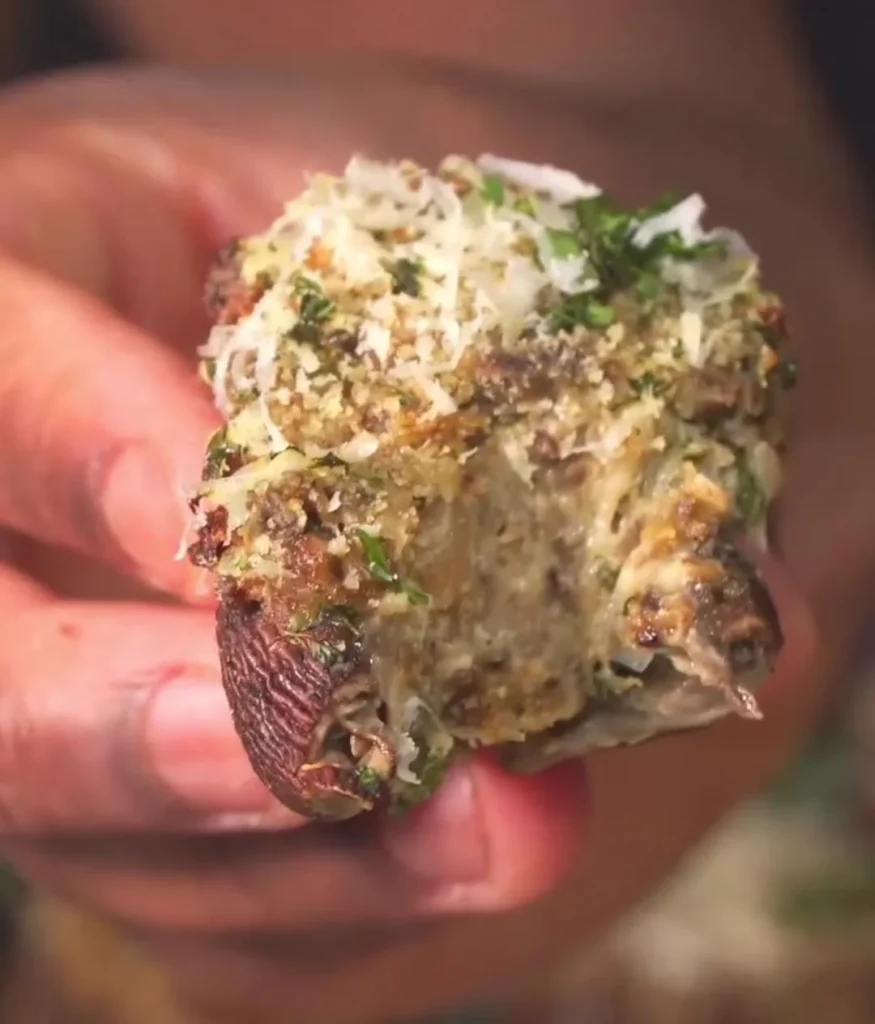
These cheese stuffed mushrooms are rich, savory, and perfect for bite-sized indulgence. They bring a warm, comforting flavor to any party spread.
Ingredients
- 10 mushrooms
- 1 cup cream cheese
- ½ cup grated cheese
- Salt and pepper
Instructions
- Preheat oven.
- Clean mushrooms.
- Remove stems.
- Mix cheeses.
- Add salt and pepper.
- Fill mushroom caps.
- Place on tray.
- Bake 15 minutes.
- Check softness.
- Remove from oven.
- Let cool slightly.
- Arrange on platter.
- Serve warm.
- Adjust seasoning.
- Enjoy.
Nutrition Notes
These bites provide a rich, creamy texture with a savory base. They’re satisfying in small portions.
Storage Tips
Store for 2 days. Reheat in oven. Keep sealed. Avoid overcooking. Best warm.
Variations
Spicy Mushrooms
Add chili flakes. Mix into filling. Adds heat. Serve warm.
Herb Mushrooms
Add herbs. Enhances aroma. Fresh taste. Serve hot.
Chicken Mushrooms
Add shredded chicken. Mix well. Makes filling hearty. Serve warm.
14. Chicken Lettuce Wraps

These lettuce wraps are light, fresh, and perfect for balancing heavier party snacks. They offer a refreshing crunch with a flavorful filling.
Ingredients
- 2 cups cooked chicken
- Lettuce leaves
- 1 carrot, shredded
- 1 tbsp soy sauce
- Salt and pepper
Instructions
- Prepare lettuce leaves.
- Shred chicken.
- Add to bowl.
- Add carrot.
- Mix well.
- Add soy sauce.
- Season with salt and pepper.
- Spoon mixture into leaves.
- Fold gently.
- Arrange on tray.
- Chill slightly.
- Serve fresh.
- Adjust seasoning.
- Keep cool.
- Enjoy.
Nutrition Notes
These wraps are light yet satisfying, offering protein and fresh crunch in every bite.
Storage Tips
Store filling separately. Assemble fresh. Keep chilled. Avoid sogginess. Best fresh.
Variations
Spicy Wraps
Add chili sauce. Mix evenly. Adds heat. Serve chilled.
Veggie Wraps
Use vegetables only. Light and fresh. Budget-friendly. Serve cool.
Saucy Wraps
Add extra sauce. Mix well. Juicy filling. Serve immediately.
15. Chocolate Dipped Fruit Bites
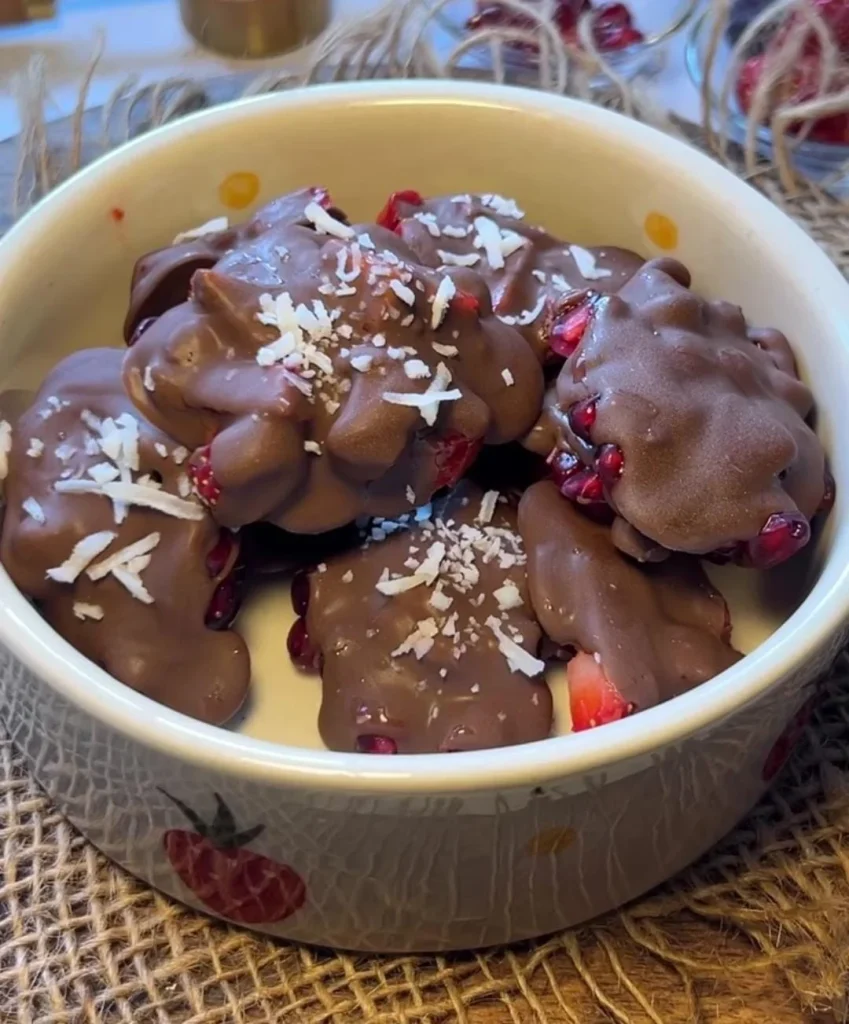
These chocolate dipped fruit bites are the perfect sweet ending to your party snacks spread. They’re simple, elegant, and loved by everyone.
Ingredients
- 2 cups mixed fruit
- 1 cup chocolate
- 1 tsp oil
Instructions
- Wash and dry fruit.
- Chop into bite sizes.
- Melt chocolate.
- Add oil and mix.
- Dip fruit into chocolate.
- Coat evenly.
- Place on tray.
- Let set.
- Chill slightly.
- Remove from tray.
- Arrange on platter.
- Serve fresh.
- Keep cool.
- Avoid melting.
- Enjoy.
Nutrition Notes
These bites offer natural sweetness with a touch of indulgence. They balance richness with freshness.
Storage Tips
Store in fridge for 2 days. Keep chilled. Avoid moisture. Serve cool. Best fresh.
Variations
White Chocolate Fruit
Use white chocolate. Dip same way. Sweeter flavor. Serve chilled.
Nut Coated Fruit
Add crushed nuts. Coat after dipping. Adds crunch. Serve fresh.
Dark Chocolate Fruit
Use dark chocolate. Richer taste. Slightly less sweet. Serve cool.
Conclusion
The beauty of party snacks lies in their ability to bring people together without effort or stress. These small, flavorful bites turn simple gatherings into memorable experiences filled with laughter, connection, and comfort.
Save these ideas, try a few for your next gathering, and let your table tell a story of warmth and creativity. With the right mix of easy party snacks, every moment becomes something worth savoring.


