Ultra-Soft Gluten-Free Pita Bread Recipe — Homemade Pocket Pitas for Sandwiches, Wraps & Meal Prep
Gluten-free pita bread is a tender, pocket-style flatbread made without wheat or other gluten-containing grains. It is designed to replicate the light, pliable texture of traditional pita while using alternative flours and binding agents. Home bakers and people with celiac disease or gluten sensitivity often seek a homemade version because many commercial gluten-free breads contain preservatives, stabilizers, or excessive sodium.
A well-formulated gluten-free pita uses a combination of flours, starches, and hydrocolloids like xanthan gum or psyllium husk to trap steam in the oven and form an internal pocket. When baked at high heat, the sudden burst of steam puffs the dough, creating that characteristic hollow center that makes pita so versatile.

This article guides you through a dependable recipe that yields soft and pliable pitas suitable for sandwiches, dipping, or stuffing. You will learn the specific role each ingredient plays, exact measurements for consistent results, practical tips for shaping and baking, and multiple variations to suit dietary needs such as paleo, grain-free, or legume-based options.
Also Read: Best Lavash Bread Recipe

Nutritional Overview
Nutritional values for gluten-free pita depend greatly on the flour blend and optional add-ins. For the base recipe detailed below, which uses a blend of gluten-free all-purpose flour and almond flour, each pita contains a moderate balance of calories, carbohydrates, fat, and some protein. Below is an approximate nutrient table per one pita from an eight-pita batch.
| Nutrient | Approximate Amount per Pita | Why It Matters |
|---|---|---|
| Calories | 180 kcal | Supplies energy for daily activity |
| Carbohydrates | 28 g | Primary fuel; choose whole grain flours to increase fiber |
| Protein | 5 g | Supports satiety and muscle maintenance |
| Fat | 6 g | Adds mouthfeel and helps nutrient absorption |
| Fiber | 2 g | Promotes digestive health; higher with oat or chickpea flours |
| Iron | 8% DV | Important for oxygen transport and energy |
| Calcium | 3% DV | Supports bone health, varies with enrichment |
To enhance the nutritional profile, consider using partial chickpea, oat, or almond flours. Psyllium husk and ground flax seed add soluble fiber and improve texture. Serving ideas such as stuffing pita with vegetables, legumes, and lean protein transform these breads into balanced meals.
Main Ingredients and Exact Quantities (Yields 8 Pitas)

Use the following quantities to make eight 6–7 inch pitas. Weighing ingredients with a scale improves consistency when working with gluten-free flours.
- Gluten-Free All-Purpose Flour Blend: 360 grams (3 cups). Choose a commercial 1:1 blend or a homemade mix of rice flour, tapioca starch, and potato starch.
- Almond Flour: 56 grams (1/2 cup). Adds moisture, tenderness, and protein. If nut-free is required, omit or replace with additional rice flour.
- Psyllium Husk Powder: 16 grams (2 tablespoons). Forms a gel with water to mimic gluten elasticity and protect pocket structure.
- Xanthan Gum: 1 teaspoon (omit if your flour blend already contains it). Enhances cohesiveness and elasticity.
- Instant Yeast: 7 grams (2 teaspoons). Produces gas and the steam needed for pita pockets.
- Warm Water: 300 milliliters (1 1/4 cups) plus additional up to 100 milliliters as needed depending on flour absorption.
- Olive Oil: 30 milliliters (2 tablespoons). Improves crumb softness and flavor.
- Salt: 9 grams (1 1/2 teaspoons). Essential for flavor and dough strength.
- Sugar or Honey: 5 grams (1 teaspoon). Feeds yeast and encourages browning; use maple syrup to keep vegan.
- Baking Powder: 2 grams (1/2 teaspoon). Provides a little extra lift for softer pockets.
- Optional Toppings: Sesame seeds, nigella, or everything seasoning, about 2 tablespoons for sprinkling.
Total dough weight before baking will be approximately 1000 to 1050 grams. Each pita after baking will be roughly 60 to 80 grams depending on hydration and trimming.
How to Prepare: Detailed, Step-by-Step Instructions
Measure and Prep Ingredients
Weigh and measure every ingredient before you begin. Place the gluten-free all-purpose flour, almond flour, psyllium husk powder, xanthan gum (if using), baking powder, salt, and sugar in separate small bowls so they are ready to combine.
Measure the water at the temperature specified in the recipe (about 110°F / 43°C for yeast activation) and have the olive oil, yeast, and any optional toppings (sesame seeds, nigella, etc.) at hand. Prepping ahead avoids pauses that can cool the water or let the yeast sit too long, and it keeps the workflow smooth—especially important when working with gluten-free doughs where timing and hydration matter.

Activate the Yeast (Blooming)
Pour the warm water into a small bowl or measuring cup, sprinkle in the sugar or honey, then add the instant yeast and gently stir. Let this sit undisturbed for 5–7 minutes. You should see a foamy, bubbly layer form on top; that indicates the yeast is active. If after 10 minutes there is no foam, discard and start with fresh yeast—using inactive yeast will prevent puffing and proper rise. If you prefer using dry active yeast, dissolve it the same way but allow an extra minute or two for activation.
Whisk the Dry Ingredients Together
In a large mixing bowl whisk the gluten-free all-purpose flour, almond flour, psyllium husk, xanthan gum (if using), baking powder, and salt until evenly distributed. Thorough mixing at this stage prevents pockets of single ingredients and ensures uniform hydration later. If your flour blend has clumps, break them up with a fork or sift the flours. Uniform dry ingredients help the dough form consistently and make rolling and pocket formation more predictable.
Combine Wet and Dry Components
Make a well in the center of the dry ingredients, pour in the foamy yeast mixture and the olive oil, and begin stirring. Use a sturdy spoon, silicone spatula, or the paddle attachment on a stand mixer. Add the initial amount of water specified in the recipe (usually 300 ml) and mix until the dough begins to hold together. At this stage the dough should be tacky—moist but not soupy. If it looks dry or crumbly, add water one tablespoon at a time until a cohesive mass forms. If it’s overly sticky, let it rest briefly and dust hands with a little gluten-free flour when shaping.

Mix and Knead Briefly (Gentle Handling)
Unlike wheat dough, gluten-free dough benefits from short, deliberate mixing rather than long kneading. Knead or mix for 1–3 minutes to fully hydrate the flours and activate the psyllium gel. Overworking can cause flours like almond or rice to break down and become gummy. If using a stand mixer, run it on low speed and stop as soon as the dough is uniform. The goal is a pliable, slightly sticky dough that holds together; you should be able to shape it without it falling apart.

First Rest — Hydration and Structure Development
Transfer the dough to a lightly oiled bowl, cover tightly with plastic wrap or a damp towel, and let it rest at room temperature for 20–30 minutes. This rest is critical: psyllium and flax (if used) need time to absorb water and form their gel network, which mimics gluten’s binding and improves elasticity. During this period the dough may become firmer and easier to shape. If the dough feels dry after resting, allow an extra 5–10 minutes or brush lightly with a teaspoon of water when rolling.
Portion the Dough and Shape into Balls
Weigh the dough and divide it into equal pieces for uniform pitas (for eight pitas, divide into ~8 portions). Roll each portion into a smooth ball with oiled hands to prevent sticking. Use a scale for accuracy to ensure even baking and consistent pockets. Cover the shaped balls with a towel and allow them to rest 5–10 minutes; this short bench rest relaxes the dough and makes rolling easier. If the dough resists, another brief rest will help.
Roll the Pitas Thin and Evenly
Place a dough ball between two sheets of parchment or on a lightly floured (gluten-free flour) silicone mat and roll to an even thickness—about 1/8 inch (3 mm) is ideal. Strive for uniform thickness across the circle; thick centers or edges will affect puffing. If the dough sticks, lift the top parchment and dust with a little additional flour or rub the roller with a touch of oil. Aim for a roughly 6–7 inch diameter for standard pitas; adjust size based on your preference.
Preheat Oven and Prepare the Baking Surface
Preheat your oven to 500°F (260°C) or the highest safe setting and place a pizza stone or an inverted heavy baking sheet on the middle rack. Let the oven preheat for at least 30 minutes so the stone/sheet becomes intensely hot—this is critical for the rapid steam burst that creates the pocket. If using a skillet method, heat a heavy cast-iron or stainless-steel skillet over medium-high heat until very hot. A properly preheated surface is the most important factor for consistent puffing.

Bake to Create the Pocket (High Heat, Short Time)
Slide two or three rolled rounds (still on their parchment) onto the hot stone or baking sheet and bake for 4–6 minutes. Watch closely: the pitas should swell quickly and form large air pockets; when they are lightly golden with scattered brown spots, remove them. Pitas bake fast—overbaking will dry them out. Immediately wrap the hot pitas in a clean towel; the trapped steam inside the towel softens the crust and keeps them pliable, which is essential for later slicing and stuffing.
Skillet Method — Quick Alternative (No Oven Needed)
If you don’t have a very hot oven, cook pitas one at a time in a preheated heavy skillet. Place the rolled round into the dry skillet and cook for 1–2 minutes until bubbles form and the underside shows golden spots. Flip and cook 1–2 minutes more; you should see puffing. For a better pocket, press the surface gently with a spatula to encourage even heat distribution. Transfer to a towel to steam-wrap and soften. The skillet method requires good heat control—too hot and the exterior will char before the interior puffs.
Cooling, Softening, and Storing for Best Texture
After baking, keep the pitas wrapped in a towel for 10–15 minutes to retain humidity and softness. For immediate use, open the pocket by inserting a knife or your fingers and gently separating the layers. For storage, cool completely then stack with parchment between and seal in an airtight container for up to three days at room temperature or freeze for up to three months. To reheat, warm on a skillet, in a moderate oven, or briefly over an open flame to restore pliability—avoid microwaving except for very short bursts as it can make gluten-free breads rubbery.
Final Tips for Consistent Results
Use an instant-read thermometer to check water temperature when activating yeast—110°F / 43°C is a safe target. Work in batches to keep the oven hot and to avoid crowding the baking surface. If you plan to make pitas regularly, record the exact flours and hydration that worked best for your kitchen so you can reproduce the result. With attention to preheating, rolling thickness, and brief resting times, you’ll reliably produce tender, pliable gluten-free pitas with perfect pockets.
Healthy Habits and Serving Suggestions
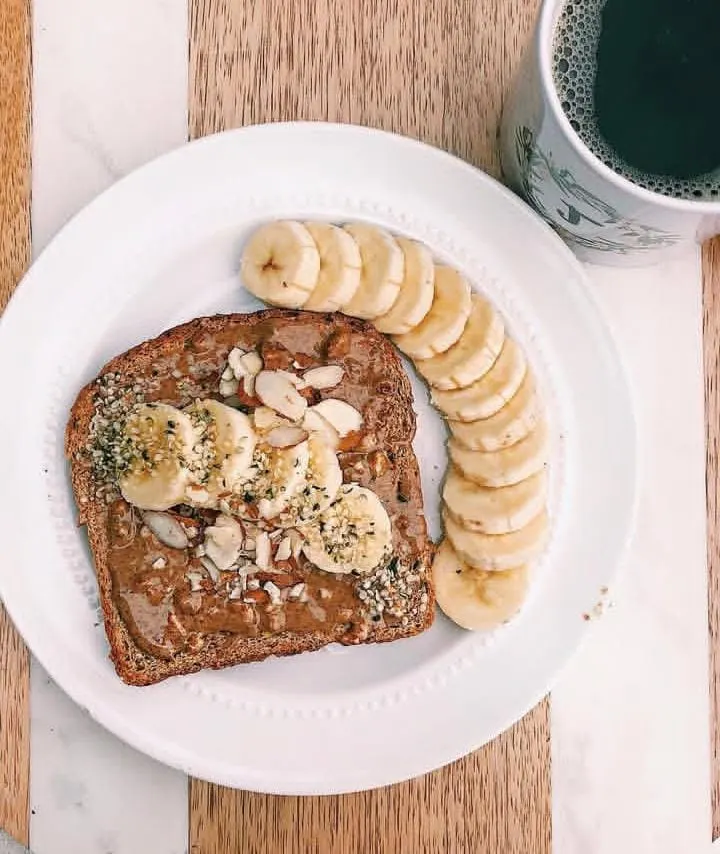
Pita bread becomes the foundation for balanced meals when paired with fresh vegetables, legumes, lean proteins, and healthy fats. Avoid filling pitas with heavy spreads alone; combine hummus with sliced cucumbers, tomatoes, spinach, and grilled chicken or tofu for a nutrient-dense sandwich. Consider using yogurt-based sauces or tahini for flavor and moderate fat rather than calorie-dense mayonnaise. Portion control is straightforward when using single pitas for individual servings, and the pocket shape minimizes overeating because fillings are contained.
To boost fiber and protein, experiment with flour substitutions such as chickpea flour or adding ground flaxseed. Incorporate seeds and whole-food toppings to enhance micronutrient intake. For blood sugar management, pair a pita with protein and non-starchy vegetables to slow digestion and maintain steadier energy. Finally, making pita at home reduces reliance on processed products, enabling you to control sodium, oil, and additives for a cleaner, healthier diet.
Variations: Easy and Creative Gluten-Free Pita Alternatives
Almond-Forward Pita
Almond-forward pita replaces a portion of the all-purpose blend with more almond flour for a tender, slightly nutty bread. Use 1 1/2 cups gluten-free blend and 1 1/4 cups almond flour, keeping psyllium and xanthan gum the same to preserve structure. Because almond flour holds more moisture, reduce initial water slightly and add more only if needed while mixing. These pitas brown faster and carry a richer flavor that pairs well with creamy spreads and roasted vegetables. They are excellent for those seeking higher protein and healthy fats in a gluten-free bread.
When handling almond-forward dough, chill the dough briefly if it feels too soft before rolling to prevent tearing. Watch the oven closely as these pitas may reach color earlier than standard versions and could overbake. If a nut-free option is required, substitute with sunflower seed flour while acknowledging a slight change in taste. Almond pitas make lovely bases for open-faced sandwiches or toasted pita chips when sliced into wedges. Store them in an airtight container and reheat gently to maintain tenderness.
Cassava Paleo Pita
Cassava flour makes a paleo-friendly pita that is grain-free and mildly sweet in flavor. Replace up to 60 percent of the blend with cassava flour and keep psyllium to improve elasticity and chew. Cassava absorbs liquid differently, so add water gradually and stop when the dough is tacky but workable. The resulting pitas are pliable and slightly translucent with a pleasing chew that holds fillings well. They are ideal for paleo meal plans and grain-free diets looking for a bread substitute.
Avoid overproofing cassava dough as it can become gummy and lose structure during baking. Use a moderate to high oven temperature to encourage puffing without excessive browning on the exterior. Purchase cassava from reputable brands to ensure consistent texture and performance in recipes. These pitas reheat well and serve as sturdy wrappers for saucy fillings during packed lunches. They also adapt well to variations with spices or herb infusions for savory applications.
Buckwheat and Oat Whole-Grain Pita
A buckwheat and oat pita adds wholesome flavor and extra fiber for a rustic, whole-grain experience. Use one cup buckwheat flour, one cup oat flour, and one cup gluten-free blend to preserve elasticity. Add psyllium and allow a slightly longer rest so flours hydrate and the dough becomes rollable. This version yields a denser crumb and a nutty, aromatic profile ideal for savory fillings. Buckwheat is naturally gluten-free and contributes unique flavor that pairs well with cheeses and roasted veggies.
To make oat flour at home, process certified gluten-free rolled oats until finely ground to avoid larger particles. When rolling these pitas, expect slightly more resistance due to the whole grains and handle gently to prevent cracking. They may take a touch longer to puff, so monitor the oven and adjust baking time as necessary. Serve warm with herbed yogurt or use as a base for open-faced tostadas for a wholesome meal. These pitas offer increased nutritional diversity suitable for whole-food focused diets.
Chickpea Flour Pita (Besan)
Chickpea flour produces hearty, protein-rich pitas with a savory flavor that complements Mediterranean fillings. Use two cups chickpea flour combined with one cup gluten-free blend and half a cup tapioca starch to maintain elasticity. Chickpea dough needs a little more hydration and a longer resting period to fully absorb liquids and firm up. Expect a denser, golden pita that browns beautifully and is excellent for grilling or toasting. These pitas pair naturally with spiced vegetables, tahini, and yogurt-based sauces.
Because chickpea flour has a pronounced taste, mixing it with neutral flours helps maintain a balanced flavor. Try adding a pinch of cumin or coriander to enhance the savory character of the bread. Monitor baking times since chickpea-based pitas may develop color faster and risk overcooking. These breads also crisp nicely when toasted and can be sliced into chips for dips. Chickpea pitas are a great choice for those wanting extra plant protein in their gluten-free baking.
Herbed Garlic Pita
Herbed garlic pitas are infused with minced garlic and fresh or dried herbs for aromatic, savory bread. Stir in one teaspoon garlic powder or two minced garlic cloves and two tablespoons chopped rosemary or parsley into the dry mix before hydrating. The herbs meld during proofing and create a fragrant pita that elevates simple meals and dips. Sprinkle sesame seeds or coarse salt on top before baking for texture and visual appeal. These pitas pair especially well with grilled vegetables and olive oil for dipping.
Use fresh herbs sparingly to avoid excess moisture which could affect dough texture during baking. If using fresh garlic, mince finely to prevent large bits from burning on the surface while baking. Dried herbs can be substituted but increase quantity slightly to maintain flavor intensity. Serve warm with a side of tzatziki or a robust tomato stew for a full-flavored meal. They also make delightful bases for quick flatbread pizzas when topped post-bake.
Flaxseed No-Yeast Flatbread
A flaxseed-based flatbread is a quick, yeast-free alternative that relies on the gelling property of ground flaxseed. Combine one cup ground flaxseed with three quarters cup gluten-free flour and one cup yogurt or plant-based yogurt to form a thick batter. Let the batter rest for ten to fifteen minutes so the flax fully hydrates and binds the mixture. Portion and roll between parchment sheets and cook on a dry skillet over medium heat for two to three minutes per side. This method yields denser, nutrient-dense flatbreads high in omega-3s and fiber.
Flax-based flatbreads will not develop pockets but are useful as wrap substitutes and sandwich bases. They rehearse well and can be quickly warmed in a skillet to restore pliability before serving. Moderate heat ensures they cook through without burning due to the oil content in flaxseed. These are particularly good for those following grain-free or low-carb meal plans. Use them for quick lunches or as a portable base for salads and proteins.
Mini Pocket Pitas
Mini pocket pitas are perfect for appetizers, kids’ lunches, and small sandwiches at gatherings. Divide the dough into twelve to fourteen pieces and roll each to about four to five inches in diameter. Bake these smaller rounds for a slightly shorter time and remove once they inflate and show light golden browning. They remain soft when wrapped in a towel and are easy to halve for sliders or small wraps. Mini pitas are visually appealing and convenient for portion-controlled servings.
Because they are smaller, mini pitas may crisp at the edges faster, so watch baking times closely. Shorten proofing time slightly as the smaller portions hydrate and expand faster than full-size rounds. Stack and freeze these with parchment between to pull out a few at a time for quick use. They are ideal for party platters filled with falafel, tzatziki, and pickled vegetables. Topping with sesame or nigella seeds before baking enhances presentation and adds texture.
Quinoa Whole-Grain Pita
Incorporating cooked quinoa adds nutty flavor, whole-grain texture, and boosts protein content in the pita. Use one cup cooked quinoa, one and a half cups gluten-free flour blend, and half a cup oat flour while reducing added water slightly. Fold the cooked quinoa gently into the dough after initial mixing to retain whole grain integrity and texture. These pitas will have a hearty crumb and are particularly satisfying when packed with cold salads or grilled vegetables. Quinoa pitas make a nutritious option for those looking to increase whole-food ingredients in their gluten-free baking.
Because quinoa is cooked, ensure excess moisture is drained to prevent the dough from becoming too wet. Gently pressing the dough while shaping helps incorporate the grains without crushing them entirely. Baking times are similar but observe for puffing and adjust slightly if the crumb seems dense. These pitas are excellent heated and stuffed for portable lunches that emphasize whole grains and plant protein. Combine with lemony tahini and roasted vegetables for a balanced and flavorful meal.
Tips, Troubleshooting, and Serving Ideas
Gluten-free baking often requires minor adjustments due to variations in flour blends and ambient humidity. If the dough tears when rolling, let it rest an additional ten minutes and try again with lightly oiled hands. If pitas fail to puff, ensure the oven and baking surface are sufficiently hot and that the rounds are rolled thinly and evenly. For softer pitas, wrap hot breads in a clean towel immediately off the baking surface to trap steam. To achieve a crispier edge or charred surface, finish briefly on a hot skillet or broiler after baking.
Store pitas at room temperature in an airtight container for up to three days or freeze in a single layer with parchment between rounds. To refresh frozen pitas, thaw in the refrigerator overnight and reheat on a skillet, in a warm oven, or in a toaster for a few minutes. Avoid microwaving as it can make bread rubbery—short bursts and a towel can help but a skillet or oven yields the best texture. Experiment with toppings before baking such as sesame seeds, za’atar, or coarse salt for added flavor and visual appeal. When feeding a crowd, keep baked pitas covered to retain moisture and serve warm for best enjoyment.
Final Thoughts
Mastering gluten-free pita at home opens up possibilities for fresh, wholesome meals that fit a variety of dietary needs. Understanding ingredient roles—how psyllium husk gels, how xanthan gum binds, and how different flours absorb liquid—reduces kitchen frustration and improves outcomes.
Once you find a formulation that works with your preferred flours, the process becomes repeatable and fast, providing warm pockets for sandwiches, dips, and more. Use the variations as a roadmap to tailor flavor and nutrition for paleo, grain-free, high-protein, or whole-grain preferences. With practice and attention to hydration and oven temperature, you can create tender, flavorful, and reliable gluten-free pitas at home.