Authentic Homemade Italian Bread Recipe | Soft, Golden & Bakery-Style Loaf (Easy No-Fail Method)
Few aromas are as comforting as the scent of freshly baked Italian bread wafting through the kitchen. With its golden crust, fluffy interior, and subtle hint of olive oil, Italian bread has earned its place as one of the world’s most beloved loaves. Unlike French baguettes, Italian bread typically features a softer, more tender crumb with a slightly chewy crust—perfect for sandwiches, dipping in olive oil, or serving beside pasta and soups.
This traditional bread, known as Pane Italiano, traces its roots to rustic Italian villages where families baked loaves daily using simple ingredients—flour, yeast, water, and salt. It’s a product of necessity and art, designed to pair harmoniously with everything from hearty minestrone to rich tomato sauces. Over generations, bakers refined the process to produce that signature golden exterior and light, flavorful interior that defines authentic Italian bread today.
From a nutritional standpoint, Italian bread is surprisingly balanced when made traditionally. A single serving (around 60 grams, or one thick slice) provides approximately 140 calories, 4 grams of protein, 26 grams of carbohydrates, and only about 2 grams of fat. When made with olive oil instead of butter or shortening, it’s lower in saturated fat and contains beneficial monounsaturated fats that support heart health. The complex carbohydrates supply steady energy, while the yeast fermentation aids digestibility. Whole-grain versions also add fiber, vitamins, and minerals such as magnesium and iron.

Italian bread embodies simplicity — yet requires patience and precision to perfect. The beauty lies in its minimalism: five core ingredients that transform through time, temperature, and texture into something extraordinary. Whether you’re a beginner or an experienced baker, this guide will walk you step by step through crafting a loaf that rivals your favorite bakery, right at home.
Also read: 20 Irresistible Gluten-Free Bread Recipes
Main Ingredients (with Full Quantities and Explanations)
This recipe yields 2 large loaves or 3 medium-sized loaves, enough for about 12–15 servings. The measurements are precise to ensure consistent texture and flavor.
1. Bread Flour – 6 cups (750 g)
Bread flour is the structural foundation of Italian bread. Its higher protein content (usually around 12–13%) produces more gluten, giving the dough its elasticity and chewy texture. This gluten network traps air bubbles formed during fermentation, helping the loaf rise beautifully and achieve that signature open crumb.
If you can’t find bread flour, you may substitute all-purpose flour, but add 1 tablespoon of vital wheat gluten per cup to improve strength. Use high-quality unbleached flour for a natural flavor and color — bleaching weakens the gluten and dulls the taste.
2. Warm Water – 2 ¼ cups (530 ml)
Water is not just hydration for the flour — it activates the yeast and enables gluten formation. The temperature of the water is critical: ideally between 100°F to 110°F (38°C–43°C). Too cool, and yeast won’t activate properly; too hot, and it can die, preventing the dough from rising.
The hydration ratio (the percentage of water relative to flour) for Italian bread typically falls around 70%, producing a supple, slightly tacky dough that creates the perfect balance between chewiness and airiness. Use filtered or bottled water if your tap water is heavily chlorinated, as chlorine can inhibit yeast activity.
3. Active Dry Yeast – 2 ¼ teaspoons (7 g, or one standard packet)
Yeast is the living engine that powers the rise of your dough. As it feeds on natural sugars in the flour, it produces carbon dioxide and ethanol — gases that expand the gluten network, giving bread its volume and depth of flavor.
For this recipe, active dry yeast is preferred because it develops flavor more slowly and deeply than instant yeast. Dissolve it first in a portion of the warm water with a pinch of sugar to “proof” it, ensuring it’s alive and bubbly before mixing. If you use instant yeast instead, skip proofing and mix it directly with the flour.
4. Sugar – 2 teaspoons (8 g)
Though Italian bread isn’t sweet, a small amount of sugar jump-starts the yeast fermentation process and enhances browning in the crust. The sugar helps the Maillard reaction occur more efficiently, giving the loaf that deep, golden hue during baking.
You can substitute honey for sugar for a more complex aroma. Avoid over-sweetening; anything more than 2 teaspoons changes the bread’s intended savory balance.
5. Salt – 2 teaspoons (10 g)
Salt does far more than season the bread; it regulates yeast activity and strengthens the gluten structure. Without salt, yeast ferments too quickly, causing the dough to collapse or develop an off flavor. Salt also enhances the aroma of the baked loaf, balancing the natural sweetness of the flour.
Use fine sea salt or kosher salt, not iodized table salt, as iodine can impart bitterness. Always add salt after the yeast has been incorporated with the flour — direct contact between undiluted salt and yeast can inhibit fermentation.
6. Olive Oil – 3 tablespoons (45 ml)
Extra-virgin olive oil gives Italian bread its iconic softness, delicate flavor, and glossy crust. The oil tenderizes the crumb by coating gluten strands, preventing them from becoming overly rigid. It also prolongs freshness, helping the bread remain moist for days.
Use a good-quality, cold-pressed olive oil — ideally Italian or Mediterranean — for authentic flavor. Some bakers brush additional oil on the loaf before baking to enhance color and create a slightly crisp outer layer.
7. Optional Ingredient – 1 Egg (for brushing, 50 g)
While traditional Italian bread doesn’t always include an egg wash, brushing one lightly beaten egg over the top before baking produces a beautiful, golden sheen. The proteins in the egg help caramelize the crust and give it that glossy, professional appearance.
You can skip this step for a more rustic matte crust, but for dinner-party presentation or bakery-style aesthetics, the egg wash is worth the extra minute.
Total Recipe Quantity
This full recipe makes about 1.4 kilograms (roughly 3 pounds) of dough, yielding two large loaves approximately 700 g each. Each loaf, when baked, will measure around 12 inches long and 5 inches wide. Once sliced, you’ll get about 12–15 slices per loaf — perfect for sandwiches, dipping, or bruschetta.
Nutritional Overview (per slice, approx. 60 g)
- Calories: 145 kcal
- Protein: 4.2 g
- Carbohydrates: 26 g
- Fat: 2 g
- Fiber: 1.5 g
- Sodium: 210 mg
- Sugars: <1 g
This makes it an ideal everyday bread for balanced diets. With olive oil instead of butter, the fats are primarily monounsaturated, contributing to heart health. Whole-grain substitutions can increase fiber and lower the glycemic impact, while using natural sea salt instead of table salt enhances minerals such as magnesium and potassium.
Before You Begin: Understanding the Dough
Italian bread dough is supple, elastic, and forgiving, but it requires attention to timing and texture. The perfect dough should feel soft, slightly tacky (but not sticky), and spring back when gently pressed. The key is proper kneading — too little, and your bread will be dense; too much, and it becomes tough. Most bakers knead for about 10–12 minutes by hand or 8 minutes in a stand mixer.
Resting times are equally vital. The first rise (bulk fermentation) allows gluten to relax and yeast to flavor the dough, while the second rise (proofing) shapes the loaf and ensures even crumb structure. Always respect these stages for authentic results.
How to Prepare Italian Bread (Step-by-Step Guide)
Making authentic Italian bread at home is both a science and an art. Each step contributes to texture, flavor, and structure. Below, every phase—from mixing to baking—is explained in detail so you understand why each action matters. This ensures that even beginners can achieve that soft, airy, golden loaf worthy of an Italian bakery.
Step 1: Activate the Yeast (Proofing)
Begin by pouring ½ cup of the warm water (from your total 2¼ cups) into a small bowl. Stir in 2 teaspoons of sugar and sprinkle 2¼ teaspoons of active dry yeast over the surface. Gently stir and let it stand for 5–10 minutes until the mixture turns foamy and fragrant. This process confirms that your yeast is alive and active.
If the mixture does not foam, discard it and start again with fresh yeast — it’s the foundation of your bread’s rise. Proper proofing also allows the yeast to wake up gradually, improving fermentation flavor. You’ll notice a subtle aroma similar to beer or doughnuts — a sign that carbon dioxide is forming.
Step 2: Mix the Dough
In a large mixing bowl (or the bowl of a stand mixer), combine 6 cups of bread flour and 2 teaspoons of salt. Make a small well in the center and pour in the activated yeast mixture, the remaining 1¾ cups of warm water, and 3 tablespoons of olive oil.
Using a wooden spoon or dough hook, begin mixing until the ingredients come together to form a shaggy mass. The dough will be sticky at first, but resist adding too much extra flour — Italian bread dough should remain slightly tacky to achieve an open, chewy crumb. Scrape down the sides of the bowl as needed. When most of the flour is absorbed, transfer the dough onto a lightly floured surface.
Step 3: Knead the Dough
Kneading develops the gluten network — the invisible structure that traps gas and creates that soft, elastic texture Italian bread is famous for. With the heels of your hands, push the dough forward, fold it back over itself, and rotate slightly after each push. Continue for 10–12 minutes.
The dough will gradually transform from rough to smooth and springy. To test for readiness, perform the windowpane test: stretch a small piece of dough between your fingers. If it stretches thin enough to let light through without tearing, the gluten is perfectly developed.
If kneading with a stand mixer, use the dough hook attachment on medium speed for about 8 minutes. Avoid overmixing — excessive kneading can make the loaf tight and less airy.
Step 4: First Rise (Bulk Fermentation)
Form the kneaded dough into a ball and lightly coat it with olive oil to prevent drying. Place it in a large, clean bowl and cover with a damp towel or plastic wrap. Set it in a warm, draft-free place (around 75°F–80°F / 24°C–27°C) for 1 to 1½ hours, or until it doubles in size.
During this rise, yeast consumes natural sugars from the flour, producing gases and acids that build flavor and texture. The dough should look puffy, smooth, and elastic when ready. Gently press a fingertip into the surface; if the indentation remains, the dough is properly risen.
If your kitchen is cool, place the bowl inside a turned-off oven with the light on — this creates a perfect warm environment without overheating.
Step 5: Punch Down and Shape the Loaves
Once the dough has doubled, punch it down gently to release excess gas — this redistributes yeast and ensures even texture. Turn the dough out onto a lightly floured surface and divide it into two equal portions (about 700 g each).
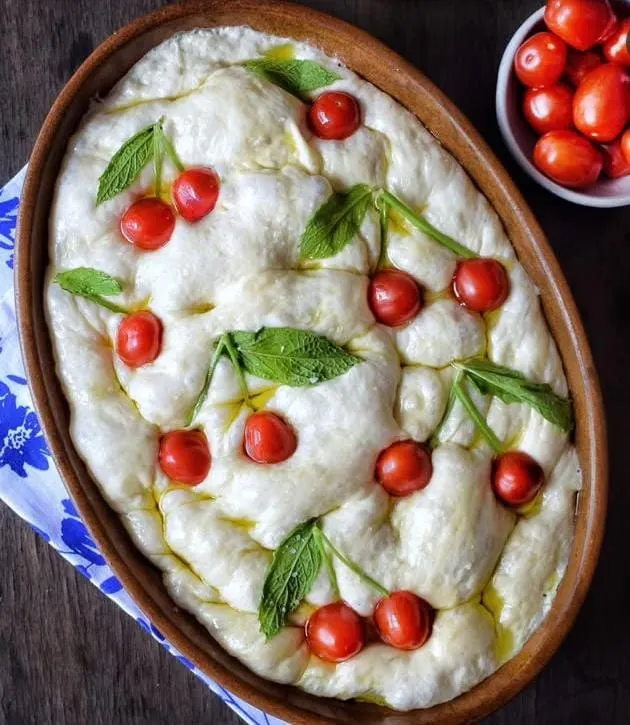
Shape each piece by flattening it into a rectangle and then rolling it tightly from one long edge, pinching the seam closed. Tuck the ends underneath to form a smooth log. This shaping method encourages an even rise and classic loaf shape. You can also form round loaves (pagnotta) by tucking the edges under to create surface tension.
Transfer shaped loaves to a parchment-lined baking sheet or into greased loaf pans. Leave at least three inches between loaves for air circulation.
Step 6: Second Rise (Proofing)
Cover the shaped loaves loosely with a clean towel and let them proof for 30–45 minutes, or until nearly doubled in volume. Proofing allows the gluten to relax again and prepares the dough for oven expansion (known as “oven spring”).
To test if proofing is complete, lightly poke the dough with a fingertip — it should spring back slowly, not instantly. If it deflates, it has over-proofed; reshape gently and let it rise again for 15 minutes. Properly proofed dough ensures light texture and evenly distributed air pockets.
Step 7: Preheat the Oven and Prepare for Baking
While the dough completes its second rise, preheat your oven to 425°F (220°C). Place a shallow metal pan on the lower rack and fill it with 1 inch of hot water — this creates steam during baking, which helps form a crisp, shiny crust.
Optionally, brush the tops of the loaves with a beaten egg or a light layer of olive oil for a golden finish. Using a sharp knife or bread lame, make 3–4 diagonal slashes across each loaf (about ½ inch deep). These cuts allow controlled expansion and prevent the crust from tearing irregularly during baking.
Step 8: Bake the Bread
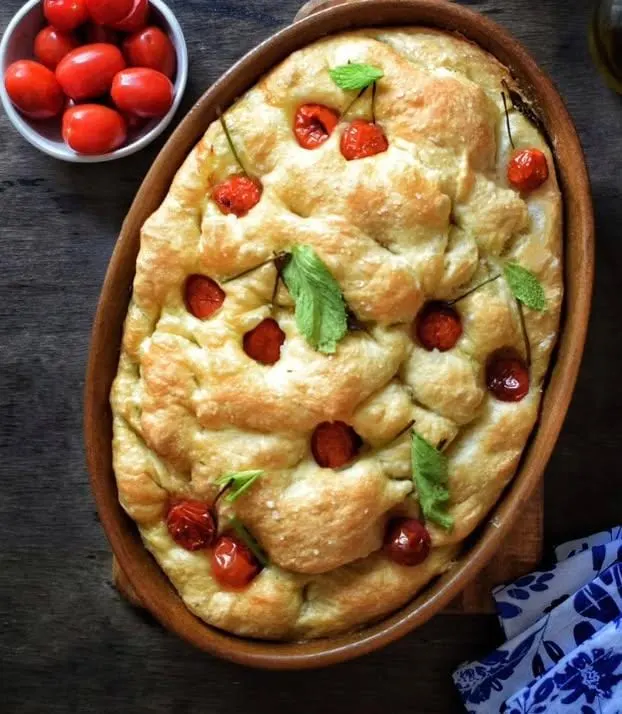
Slide the baking tray into the center rack and bake for 25–30 minutes, or until the loaves turn deep golden brown. The crust should appear firm and slightly blistered. To check for doneness, tap the bottom of one loaf — it should sound hollow. For accuracy, an internal temperature of 195°F–200°F (90°C–93°C) confirms the bread is baked through.
Avoid opening the oven frequently; losing heat and steam can affect the final crust. If you prefer an extra-crisp shell, bake 5 minutes longer after removing the water pan.
Step 9: Cool the Loaves Properly
Cooling is a crucial yet often overlooked step. Place the baked loaves on a wire rack and let them cool for at least 30–45 minutes before slicing. During this time, residual heat finishes setting the crumb and evaporating moisture from within, preventing gummy texture.
Resist the temptation to cut too early; slicing hot bread releases steam and can make the interior dense. Once cooled, the loaf should be light, springy, and aromatic, with a thin, golden crust that cracks gently when pressed.
Step 10: Storage and Serving Suggestions
Store cooled Italian bread at room temperature in a paper or linen bag for up to 3 days. Avoid sealing in plastic, as trapped moisture softens the crust. To refresh, lightly sprinkle the loaf with water and warm it in a 350°F oven for 5–7 minutes.
This bread pairs wonderfully with olive oil and balsamic vinegar, marinara sauce, or soft cheeses. For sandwiches, slice horizontally and toast slightly for added structure. You can also transform stale slices into croutons or breadcrumbs — waste nothing; every part of the loaf has a use.
Healthy Habits and Nutritional Balance
Italian bread, when made traditionally, can be part of a balanced diet rather than an indulgence to avoid. The key lies in portion control and mindful pairing. Each slice provides long-lasting energy thanks to complex carbohydrates that digest slowly, preventing blood-sugar spikes. When combined with olive oil, vegetables, and lean protein—like grilled chicken or beans—it becomes a component of a Mediterranean-style meal proven to support heart health.
The minimal fat in classic Italian bread comes mostly from olive oil, which contributes monounsaturated fatty acids that help regulate cholesterol. Opt for small portions—one or two slices per meal—and focus on quality toppings such as tomato, basil, and fresh mozzarella instead of processed spreads. Homemade bread also lacks preservatives, artificial flavors, and refined oils common in commercial loaves, making it cleaner fuel for your body. Baking at home reconnects you with real ingredients and fosters appreciation for food made by hand.

Recipe Variations
Below are six easy, creative variations. Each version keeps the core recipe intact but introduces subtle differences in flavor, texture, or nutritional value. Every variation is written in two concise five-line paragraphs for clarity and simplicity.
1. Whole-Wheat Italian Bread
Replace half the bread flour with whole-wheat flour (3 cups each). The dough will absorb more water, so add 2 extra tablespoons of warm water during mixing. Whole-wheat flour adds fiber, B-vitamins, and minerals, deepening the bread’s color and giving it a hearty aroma. The crumb becomes denser but remains tender when kneaded well.
The flavor is nutty and slightly sweet, ideal for bruschetta or sandwich bases. Whole-wheat versions stay fresh longer due to higher natural oils in the bran. For a lighter texture, sift the flour once to remove larger bran flakes. Brush the crust with olive oil after baking for a softer finish and richer golden tone.
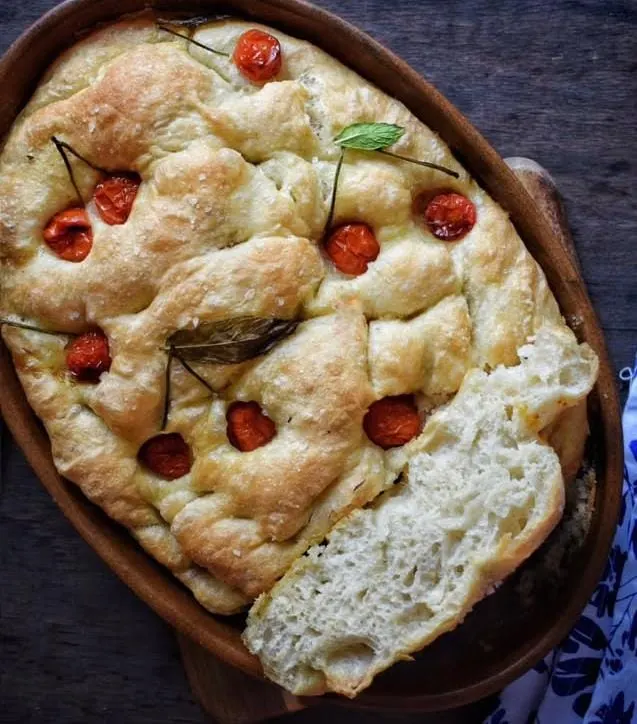
2. Rosemary & Sea-Salt Italian Bread
Infuse the dough with 1 tablespoon finely chopped fresh rosemary and sprinkle coarse sea salt on top before baking. The herb releases essential oils into the dough, giving each slice a subtle pine-like aroma reminiscent of Mediterranean kitchens. Salt crystals add texture and bursts of flavor in every bite.
This fragrant loaf pairs perfectly with soups or roasted meats. You can experiment with thyme, oregano, or basil for alternative herb profiles. When reheating, lightly toast slices to awaken the aroma of the herbs. This version not only tastes exquisite but provides natural antioxidants from the rosemary.
3. Garlic-Parmesan Italian Bread
Mix 2 minced garlic cloves and ¼ cup grated Parmesan cheese directly into the dough before kneading. The garlic infuses a gentle savoriness, while Parmesan adds umami and enhances browning through natural sugars and proteins. The aroma while baking is irresistible.
Serve this version warm alongside pasta or grilled vegetables. For a deeper flavor, brush the top with melted butter mixed with minced parsley after baking. The combination transforms a simple loaf into a meal accompaniment that rivals garlic bread—rich but still rooted in authentic Italian technique.
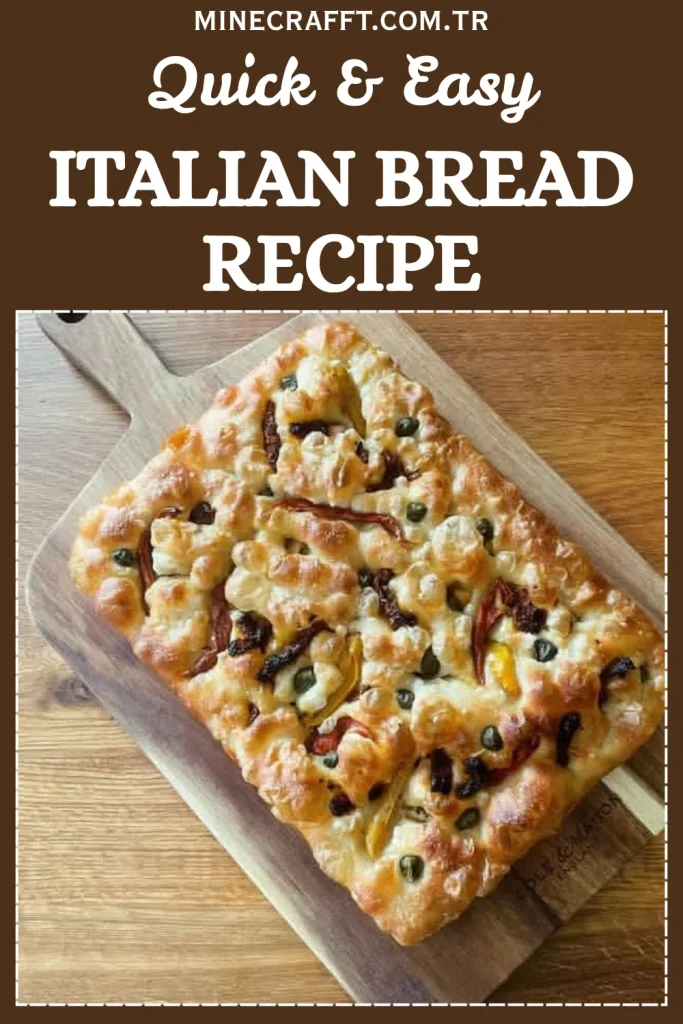
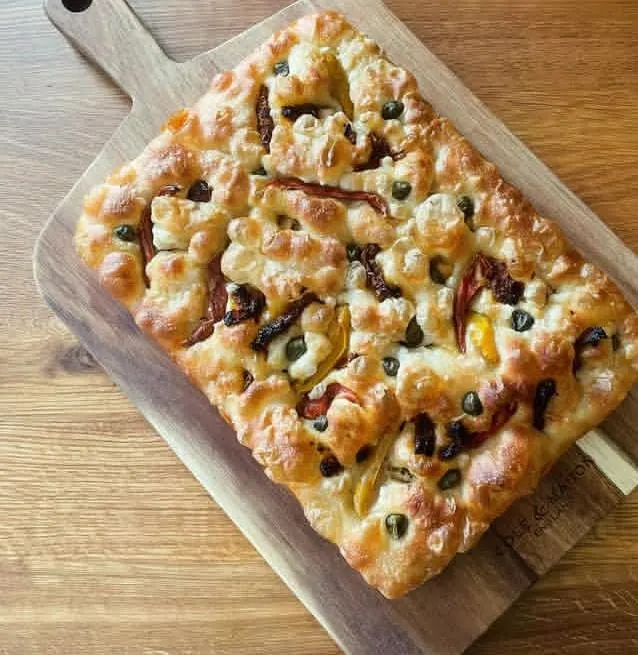
4. Olive & Sun-Dried Tomato Italian Bread
Fold ½ cup chopped sun-dried tomatoes and ½ cup sliced black or green olives into the dough after the first rise. The tomatoes contribute tangy sweetness, while the olives add briny complexity. Together they introduce moisture and Mediterranean flair.
This variation makes an ideal picnic or charcuterie bread. Slice it thick, drizzle with olive oil, and serve with cheese and grapes for a balanced snack. Because olives add salt, reduce added salt in the base recipe by half. Each bite becomes a journey through classic Italian coastal flavors.
5. Sweet Italian Bread with Honey and Almonds
Add 3 tablespoons honey to the liquid ingredients and sprinkle sliced almonds over the loaves before baking. The honey caramelizes into a delicate glaze that enhances color and aroma. Almonds provide crunch and healthy fats, turning this into a lightly sweet breakfast loaf.
Serve with fresh fruit or a drizzle of more honey instead of jam. The bread stays moist for days due to natural sugars. It’s a gentle alternative to pastries—comforting, slightly sweet, and perfect with cappuccino. Despite its sweetness, it still uses wholesome ingredients without refined additives.
6. Rustic Semolina Italian Bread
Substitute 2 cups of bread flour with semolina flour, made from durum wheat. Semolina creates a golden hue, firm crust, and distinctive chewy bite. Its coarse texture improves structure and gives the bread a bakery-style crackle. Add an extra tablespoon of olive oil for softness.
Semolina bread is a Southern Italian staple known for its nutty, slightly sweet taste. It’s excellent for sandwiches that need sturdy slices, such as roasted-vegetable panini. This variant also toasts beautifully and retains freshness longer. A light dusting of semolina on the crust before baking enhances rustic appearance.
Healthy Baking Habits
Incorporating healthy habits into your baking routine improves not only your bread but your lifestyle. Start by measuring precisely—too much flour creates dense loaves, while consistent hydration ensures digestibility. Choose organic, unbleached flour when possible; it retains nutrients and avoids chemical bleaching. Use moderate salt and good olive oil rather than shortening or butter.
Practice portion awareness: bake two loaves, freeze one, and enjoy the other fresh to minimize waste. Consider baking once a week instead of buying packaged bread—homemade loaves contain no artificial preservatives, and the process itself is therapeutic. The rhythm of kneading, rising, and baking connects you to centuries of traditional craftsmanship. Baking becomes not just food preparation but a mindful act that slows you down in a busy world.
Expert Tips for Consistent Results
- Temperature Control: Yeast thrives between 100°F–110°F. Too cold slows fermentation; too hot kills it.
- Hydration Matters: A slightly sticky dough leads to lighter crumb—don’t over-flour.
- Steam for Crust: Always bake with steam or a water pan to achieve that authentic Italian shell.
- Proper Cooling: Let loaves rest fully before slicing; cutting early compresses the crumb.
- Use Fresh Yeast: Expired yeast leads to dense bread—proof it every time.
- Avoid Over-Proofing: The dough should double, not triple, before baking.
- Freeze Wisely: Wrap cooled loaves in foil, then seal in freezer bags; thaw at room temperature for best texture.
Serving Ideas
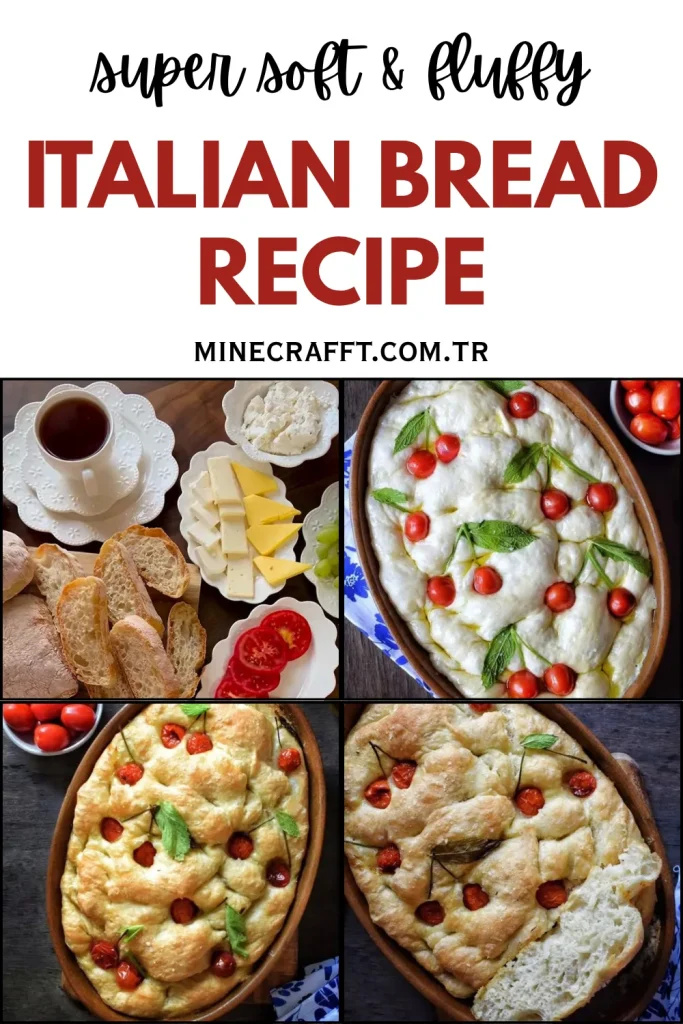
Italian bread’s versatility makes it ideal for countless dishes. Serve thick slices brushed with olive oil and rubbed with garlic for classic bruschetta. Layer it with tomatoes, basil, and mozzarella for Caprese sandwiches. Use it to soak up sauces from pasta, risotto, or roasted vegetables. Day-old slices transform beautifully into panzanella salad or toasted crostini topped with ricotta and herbs.
For breakfast, toast lightly and top with avocado, poached egg, or a drizzle of honey. In winter, pair warm slices with hearty soups. No matter the season, Italian bread adapts effortlessly to your table, blending rustic simplicity with elegance.
Conclusion
Authentic Italian bread reflects the heart of traditional Mediterranean cooking—humble ingredients elevated through patience, balance, and care. From mixing and kneading to the final golden crust, every stage honors the rhythm of old-world baking. The combination of bread flour, yeast, olive oil, and time produces something far greater than the sum of its parts: a loaf that’s soft inside, crisp outside, and filled with warmth.
By mastering this recipe, you gain not just a culinary skill but a connection to history. The scent of your kitchen will mirror that of Italian bakeries at dawn, where bread symbolizes family and community. Whether you make the classic version or experiment with herbs, whole grains, or semolina, each loaf tells your own story. Serve it proudly, share it generously, and remember that good bread—like good tradition—begins with simple, honest effort.