Creamy Coconut Chicken Curry Recipe – Easy, Flavorful, and Comforting Homemade Dinner
Introduction: What is Creamy Coconut Chicken Curry?
Creamy Coconut Chicken Curry is one of those dishes that feels like a warm hug in a bowl. Known for its velvety sauce, fragrant spices, and tender pieces of chicken, this curry strikes a perfect balance between richness and spice. Unlike heavy cream-based curries, this recipe uses coconut milk to create a naturally creamy texture with a hint of tropical sweetness. It’s a versatile dish, equally perfect for a family dinner, a cozy weeknight meal, or an impressive dish to serve to guests.
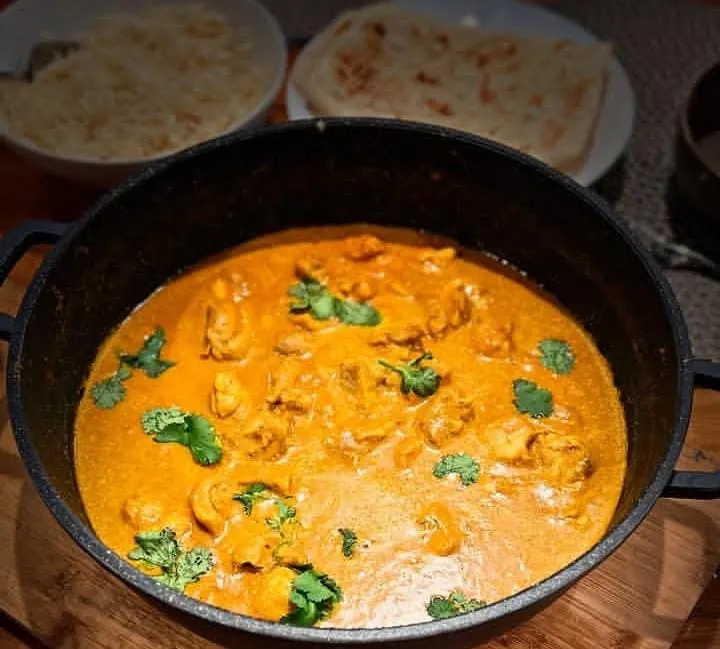
What makes this curry so loved is the layering of flavors: onions caramelized until golden, garlic and ginger sizzling in oil, spices blooming to release their aroma, and finally, coconut milk poured in to bring it all together. It’s not overly complicated, yet the result tastes like it came straight from a restaurant.
This dish also adapts beautifully to different diets. It can be made milder for kids or extra spicy for those who love a kick. You can swap vegetables, play with spices, and even make it vegetarian with tofu or chickpeas. Creamy Coconut Chicken Curry is more than just food—it’s comfort, tradition, and creativity all simmered together in one pot.
Also Read: Coconut Rice Recipe
Main Ingredients Of Coconut Chicken Curry
Every ingredient in this dish plays a role in building its depth of flavor and silky consistency. Let’s break them down one by one:

- Chicken (2 lbs / 900 g, boneless, skinless thighs or breasts)
Chicken thighs are ideal because they stay tender and juicy even after simmering. Breasts can also be used for a leaner version, but thighs deliver maximum flavor and richness. Cutting them into bite-sized chunks ensures even cooking. - Coconut Milk (2 cans, 13.5 oz each)
The heart of the recipe. Full-fat coconut milk creates the luxurious creaminess that defines this curry. Light coconut milk can be substituted, but the dish will be less rich. Always shake the can before opening to blend the separated cream. - Onions (2 large, finely chopped)
Onions form the base flavor. When slowly cooked until golden, they add natural sweetness and body to the sauce. Skipping proper caramelization leads to a flat-tasting curry. - Garlic and Ginger (4 cloves garlic + 2-inch ginger, minced)
Garlic provides pungency, while ginger adds warmth and a slight peppery bite. Together, they balance the richness of coconut milk and bring freshness to the curry. - Spices (Curry Powder 2 tbsp, Turmeric 1 tsp, Paprika 1 tsp, Cumin 1 tsp, Coriander 1 tsp, Chili Powder ½–1 tsp)
These spices create the curry’s signature flavor. Curry powder gives a rounded base, turmeric adds color and earthiness, cumin and coriander add warmth, paprika gives sweetness, and chili brings heat. Adjust spice levels to taste. - Tomatoes (2 medium, finely chopped or 1 cup canned diced)
Tomatoes add acidity and a touch of tanginess that balances the creamy coconut. They also deepen the color of the sauce. - Fresh Cilantro (½ cup, chopped)
Cilantro brightens the dish with a herbal note and is often sprinkled just before serving for freshness and visual appeal. - Oil or Ghee (3 tbsp)
Used to sauté onions, garlic, and spices. Ghee gives a nutty flavor, while vegetable oil keeps it lighter. Coconut oil can also enhance the tropical profile. - Salt and Pepper (to taste)
Essential for balance. Always season at different stages, not just at the end. - Optional Add-ins (Vegetables like bell peppers, peas, spinach, or carrots)
These not only add nutrition but also color and variety. They can be stirred in near the end to keep them vibrant.

How to Prepare Creamy Coconut Chicken Curry (Full, In-Depth Guide)
This preparation section is the heart of the recipe. Cooking curry isn’t just about combining ingredients — it’s about layering flavors, respecting textures, and timing each step carefully. Below, you’ll find each stage explained in depth, with pro tips and tricks included to help you make the most flavorful and creamy curry possible.
Step 1: Set Up Your Cooking Space
Before cooking begins, create a well-organized workspace. Place all ingredients within reach: onions finely chopped, garlic and ginger minced, tomatoes diced, spices pre-measured into a small bowl, and chicken cut into even chunks. This “mise en place” (French for “everything in its place”) avoids mistakes and keeps the cooking flow smooth.
Pro Tip: Always keep a small bowl of warm water nearby. Cooking curry requires frequent stirring, and dipping your spoon or spatula in water prevents sauce from sticking.

Step 2: Heat Oil and Sauté Onions Slowly
Heat 3 tablespoons of oil or ghee in a heavy-bottomed pot over medium heat. Once shimmering, add chopped onions. Stir occasionally and allow them to cook down for 8–10 minutes. They should turn golden brown, not burned.
Why so much patience? Properly caramelized onions release natural sweetness, which balances the richness of coconut milk. This is the first layer of depth in your curry. If you rush this step, your curry may taste one-dimensional.
Pro Tip: Add a pinch of salt early while sautéing onions. It draws out moisture, helping them soften and caramelize faster.
Step 3: Add Garlic and Ginger
Once the onions are golden, stir in minced garlic and ginger. Sauté for 1–2 minutes until fragrant. Garlic burns quickly, so keep the heat controlled and stir constantly. This is where your kitchen fills with that irresistible curry aroma.
The ginger provides a warm zing that cuts through the richness of the coconut milk, while garlic builds savory depth. Together, they balance the flavors so the curry doesn’t taste heavy.
Step 4: Bloom the Spices
Now add your spice blend directly into the onion mixture: curry powder, turmeric, cumin, coriander, paprika, and chili powder. Stir constantly for 30–60 seconds. This “blooming” process activates the oils in the spices, releasing their aroma and intensifying flavor.
If you simply add spices later in the sauce, they remain raw and sharp. Blooming ensures they blend smoothly with the base.
Pro Tip: If the pan looks too dry at this stage, drizzle in a teaspoon of oil. This prevents spices from scorching and keeps them fragrant instead of bitter.
Step 5: Stir in Tomatoes
Add diced tomatoes to the pot and stir well. Cook for 5–7 minutes until the tomatoes break down into a thick paste. This forms a natural gravy base and adds tanginess that balances the creamy coconut milk.
Pro Tip: If using canned tomatoes, simmer them longer to cook out excess acidity. You want a mellow, rounded flavor before adding chicken.
Step 6: Add Chicken Pieces
Push the tomato-spice mixture aside and add your chicken chunks. Allow them to sear for 3–4 minutes until lightly golden on the outside. This seals in juices and prevents the chicken from drying out later. You don’t need to cook the chicken fully at this stage; it will finish cooking in the sauce.
Pro Tip: Do not overcrowd the pan. If using a smaller pot, sear chicken in batches for proper browning. Overcrowding leads to steaming instead of searing.
Step 7: Pour in Coconut Milk
Shake the cans of coconut milk before opening (the cream often separates on top). Pour two full cans into the pot and stir well, scraping the bottom to loosen all the flavorful browned bits.
You’ll immediately notice the sauce turning creamy, rich, and beautifully golden. The coconut milk tames the spices, creating harmony and depth.
Pro Tip: Always use full-fat coconut milk for creaminess. Light coconut milk results in a thin, watery sauce that lacks body.
Step 8: Simmer Gently
Bring the curry to a gentle boil, then immediately lower the heat to a simmer. Cover partially with a lid and let it cook for 20–25 minutes. Stir occasionally to prevent sticking at the bottom.
During this time, the chicken absorbs the flavors, the spices mellow, and the sauce thickens naturally. A gentle simmer is crucial; boiling too hard may cause the coconut milk to split.
Pro Tip: If you prefer a thicker curry, remove the lid during the last 5 minutes to allow the sauce to reduce.
Step 9: Taste and Adjust Seasoning
After 20 minutes, check the seasoning. Add salt, pepper, or more chili powder depending on your preference. A splash of lime juice at this stage can brighten the flavors and cut through the richness.
Pro Tip: If the curry tastes too spicy, stir in a teaspoon of sugar or honey. Sweetness balances heat beautifully without dulling flavor.
Step 10: Finish with Fresh Herbs
Turn off the heat and stir in freshly chopped cilantro. This herb lifts the entire dish, adding freshness and a vibrant pop of green against the golden sauce.
You can also garnish with thinly sliced red chili, toasted coconut flakes, or even a drizzle of coconut cream for an elegant finish.
Step 11: Rest Before Serving
Let the curry sit for 5–10 minutes before serving. This resting time allows the sauce to thicken slightly and the flavors to meld further.
Pro Tip: Many chefs say curry tastes better the next day. If you have time, make it in advance and let it rest overnight. The flavors deepen and become more complex.
How to Serve Creamy Coconut Chicken Curry
Curry is not just about cooking; it’s about presentation, pairing, and atmosphere. When served thoughtfully, your creamy coconut chicken curry can feel like an everyday comfort dish or a gourmet showstopper. Below are detailed serving ideas, plating tips, and creative pairings to elevate the dish.
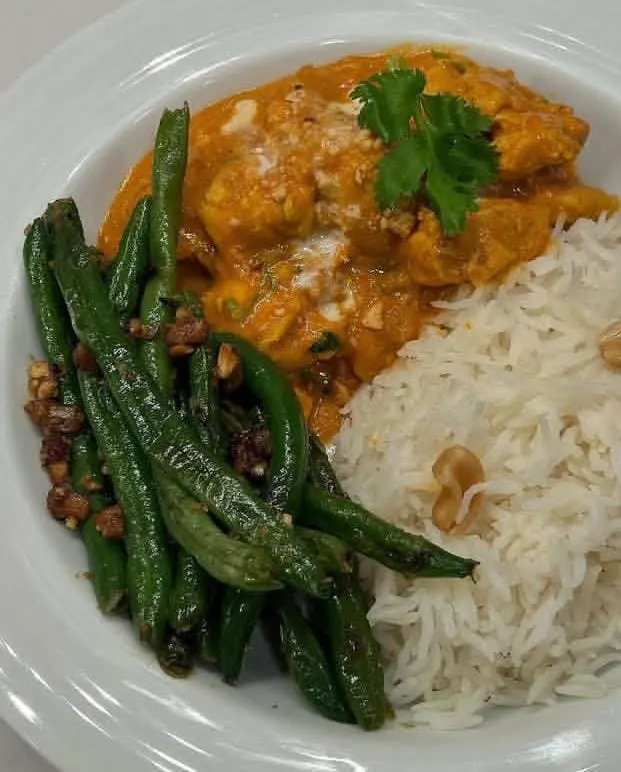
1. Traditional Serving with Rice
The most classic way to serve this curry is with steamed basmati rice or jasmine rice. The grains soak up the creamy sauce beautifully, balancing the richness with a mild, fluffy base. To elevate the experience, lightly toast the rice with a teaspoon of ghee and a pinch of cumin seeds before steaming. This adds subtle fragrance that complements the curry.
Pro Tip: Serve rice in a separate bowl or mound it neatly in the center of a plate, then ladle curry around it. This creates a restaurant-style presentation where each spoonful combines rice with sauce.
2. With Freshly Baked Flatbreads
Pair the curry with naan, roti, or parathas for a hearty and indulgent experience. Warm bread scoops up the thick, flavorful sauce better than utensils sometimes can. Lightly brush the bread with garlic butter and sprinkle with fresh herbs before serving for an aromatic upgrade.
Pro Tip: Serve bread on a wooden board or basket lined with a napkin to keep it warm and inviting throughout the meal.
3. Curry Bowls for Modern Flair
For a contemporary twist, serve your curry in personalized curry bowls. Layer rice or quinoa at the base, ladle curry on top, and finish with fresh toppings like sliced red chilies, microgreens, or a swirl of coconut cream. This makes each portion feel vibrant and Instagram-worthy.
Pro Tip: Choose deep ceramic or rustic stoneware bowls for visual appeal. The earthy tones of the bowls make the golden curry stand out beautifully.
4. Family-Style Feast
If serving for a gathering, go family-style. Place the curry in a large, wide serving dish and surround it with smaller bowls of accompaniments: lime wedges, chopped cilantro, sliced onions, cucumber raita, and mango chutney. This allows guests to customize their plates, making the meal interactive and enjoyable.
Pro Tip: Always serve curry hot. Use a ceramic or cast-iron serving bowl, which retains heat and keeps the sauce warm throughout dinner.
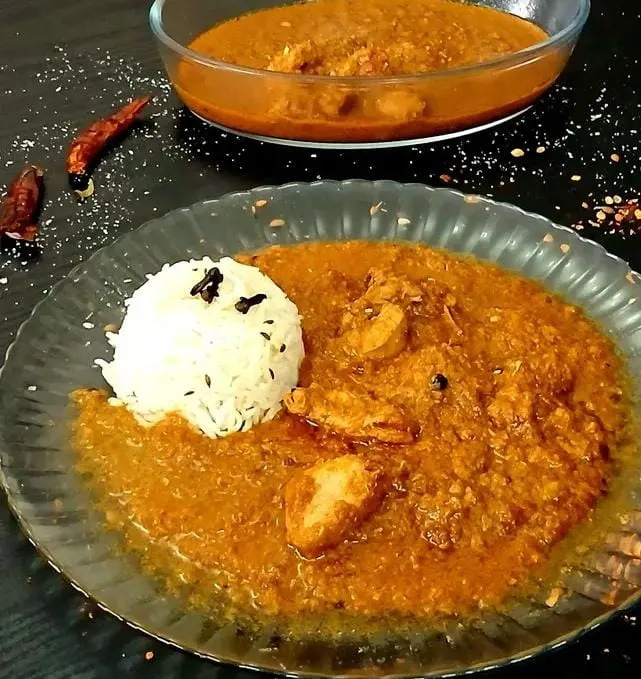
5. Elegant Party Plating
For formal dinners or celebrations, plate curry with more attention to design. Place a small dome of saffron-infused rice at the center, spoon curry artfully around it, and garnish with fresh cilantro sprigs, toasted coconut shavings, and a drizzle of coconut cream. A few edible flowers or a sprinkle of gold leaf can make the dish look fit for royalty.
Pro Tip: Wipe the edges of the plate before serving. A clean rim instantly makes the dish look professional and appealing.
6. Fusion-Inspired Serving Ideas
Take your curry beyond traditional pairings. Serve it over couscous, quinoa, or even spaghetti for a fun twist. You can also spoon curry into wraps or pita pockets for a handheld version that works great for lunchboxes or picnics. For a low-carb option, pair with cauliflower rice or zucchini noodles.
Pro Tip: If going fusion, balance flavors by keeping toppings simple. A dollop of plain yogurt or a squeeze of lime helps bridge global styles while keeping the curry as the star.
7. Beverage Pairings
Drinks elevate the meal further. A chilled mango lassi balances spice with sweetness, while sparkling water with lime refreshes the palate. For dinner parties, light white wines such as Riesling or Gewürztraminer pair well with coconut-based curries, as their fruity notes complement the creamy richness.
Pro Tip: Avoid overly tannic red wines — they clash with the curry’s creaminess. Stick to fruity, refreshing beverages.
8. Garnishing for Final Touch
Never underestimate garnish. Sprinkle freshly chopped cilantro, thinly sliced green onions, or toasted coconut flakes just before serving. These final touches not only enhance flavor but also add texture and color contrast. A drizzle of coconut cream in a spiral pattern instantly makes the curry look gourmet.
Pro Tip: Less is more — garnish should highlight the dish, not overwhelm it. A few thoughtfully placed toppings make a bigger impact than crowding the plate.
How to Store Creamy Coconut Chicken Curry (Full, In-Depth Guide)
One of the best things about curry is how beautifully it holds up for later meals. The spices continue to mingle, the sauce deepens in flavor, and the chicken stays tender if stored properly. Below are in-depth methods for storing and reheating your creamy coconut chicken curry without losing its luscious texture or vibrant taste.

1. Cooling Before Storage
Always allow the curry to cool slightly before storing — but not for too long. Leaving it out at room temperature for more than 2 hours encourages bacterial growth. The ideal method is to let the curry cool in the pot for 15–20 minutes, then transfer it into shallow containers to speed up cooling.
Pro Tip: Divide large batches into smaller containers. Shallow storage allows the curry to chill evenly in the fridge, reducing the risk of spoilage.
2. Refrigeration Method
For short-term storage, keep the curry in the refrigerator. Transfer it into airtight containers, preferably glass or BPA-free plastic. Properly sealed, your curry will last 3–4 days in the fridge.
The creaminess of coconut milk holds up well in refrigeration, but you may notice a slight separation of oil and sauce. This is normal and easily fixed by stirring when reheating.
Pro Tip: Avoid storing curry in the pot you cooked it in, especially if it’s metal. Acidic ingredients like tomatoes can react with metal and alter the flavor over time.
3. Freezing for Long-Term Storage
If you’ve made a large batch, freezing is the best option. Pour the cooled curry into freezer-safe containers or heavy-duty freezer bags, removing as much air as possible to prevent freezer burn. Label each container with the date so you can keep track. Properly frozen, curry lasts up to 3 months.
Pro Tip: Freeze in portion sizes. This way, you only defrost what you need instead of thawing and refreezing, which can compromise both safety and texture.
4. Reheating Curry
When ready to enjoy again, reheat gently. If refrigerated, transfer curry to a saucepan and warm over medium-low heat, stirring often. If frozen, thaw overnight in the fridge before reheating.
Avoid blasting curry in the microwave at high power; it can cause the coconut milk to split and the chicken to toughen. If using a microwave, heat in short bursts and stir between each.
Pro Tip: Add a splash of coconut milk or water while reheating. This revives the creaminess and prevents the sauce from becoming too thick.
5. Storage Safety and Quality Checks
Always smell and taste a small spoonful before reheating leftovers. If the curry has an unusual sour odor, discoloration, or mold spots, discard it immediately.
Pro Tip: Remember the “2-2-4 rule”: refrigerate within 2 hours of cooking, store in shallow containers no more than 2 inches deep, and consume within 4 days (unless frozen).
6. Meal-Prep and Make-Ahead Strategy
Curry is a dream meal-prep option. Store rice and curry separately in meal-prep containers to prevent the rice from soaking up too much sauce. Assemble just before eating. For busy weeks, freeze individual portions of curry and rice together in divided containers.
Pro Tip: If storing for work lunches, add garnishes (like cilantro or lime wedges) fresh before serving, not during storage, to maintain brightness.
Variations of Coconut Chicken Curry
- Thai-Style Coconut Chicken Curry
Add Thai red or green curry paste, fish sauce, and fresh basil for a fragrant Southeast Asian twist. - Spicy Coconut Chicken Curry
Increase chili powder, add fresh green chilies, or use hot paprika for a fiery version perfect for spice lovers. - Vegetable Coconut Curry
Replace chicken with chickpeas, cauliflower, or sweet potatoes for a hearty vegetarian option that’s just as satisfying. - Coconut Chicken Curry with Spinach
Add fresh spinach leaves in the last five minutes of cooking. They wilt beautifully into the sauce and boost nutrition. - Coconut Chicken Curry with Cashews
Blend soaked cashews with water to create a creamy paste and add it to the curry for a nutty, rich flavor. - Light Coconut Chicken Curry
Use light coconut milk, lean chicken breast, and extra vegetables for a healthier, lower-calorie version without sacrificing taste.
Conclusion: Bringing Comfort and Elegance Together
Creamy Coconut Chicken Curry is more than just a recipe—it’s an experience. From the rich aroma of simmering spices to the silky smooth texture of coconut milk blending with tender chicken, this dish captures both comfort and sophistication in every bite. What makes it truly special is its versatility: you can serve it as a simple family meal with warm rice, or elevate it into a centerpiece for a festive dinner spread.
Throughout this guide, we explored the heart of the recipe: the ingredients that give it depth, the step-by-step preparation to ensure perfect balance, and the thoughtful ways to serve and store it. Along the way, we uncovered common mistakes to avoid, clever tips to master, and even creative variations that allow you to reinvent the dish for different occasions and palates. This makes the recipe not just a one-time effort but a skill you can refine, adapt, and proudly repeat for years to come.
What truly sets creamy coconut chicken curry apart is its universal appeal. It is indulgent yet nourishing, exotic yet familiar, and bold yet comforting. Whether you’re cooking for your family on a weeknight, preparing a make-ahead freezer meal, or impressing dinner guests with restaurant-worthy plating, this curry always rises to the occasion.
At its core, this dish is about harmony—the way spices warm your senses, the coconut milk softens the edges, and the chicken soaks in every layer of flavor. It invites creativity and flexibility, yet rewards attention to detail and care in cooking. Each spoonful reminds us that food can be both a comforting hug and an elegant expression of culinary artistry.


